Pages

Wednesday, October 18, 2017

Ogden Nature Center Field Trip

We went to the Nature Center to attend a talk about Owls. It was interesting and good, but mostly it was just nice to be outside in the warm October weather.
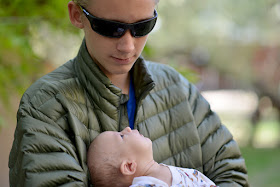
Ezekiel CANNOT GET ENOUGH of Abe! How does he keep his neck like that for long periods of time? It hurts my neck just to look at it. But he's always craning around to see things. I try to straighten out his head and he pops it right back into its unnatural position so he can keep looking at what he wants to look at.

Tuesday, October 17, 2017

Birds of Prey Homeschool Unit Schedule and Lesson Plan

(click to enlarge)

After taking some time off when baby Ezekiel was born, our first unit back was Birds of Prey. We had a Bird Unit several years ago (Malachi loves birds) but this was a little more specialized. I mostly wanted the children to dissect owl pellets, which is something I did when I was younger and thought it was SO cool. And they loved it!
We got our owl pellet kits here. The tiny skeletons you find inside are so cool! Some of the children were more patient than others with their tweezers, but all of them were able to find and identify lots of little bones.

More useful links:

There are lots of activity ideas here in our previous Bird Unit

We listened to some of our favorite bird call videos, like this one, of a lyrebird imitating construction noises
We made cute little clay owls from air-dry clay


And here are a few pictures from our field trip to the aviary on a lovely (hot!) Fall day. Even baby Ezekiel enjoyed it!
Flamingos
Barn Owl--our favorite!
Daisy got her tiny penguin finger puppet at this aviary when she was just a wee tot! It is the thing that started her love of penguins, I think.
Junie, Daisy, Goldie. (Oh, how fast the time goes. It seems like yesterday my three little boys were standing by this sign!)

Monday, September 25, 2017

Sun and Eclipse Unit Study

Before we went on our short trip to Idaho to see the solar eclipse (which was AMAZING—you can read about it here on my other blog), I decided to squeeze in a short unit on the sun and eclipses. A lot of this was review for the older kids, but it was new to the younger ones, and we all had fun with the models. I had some good ideas that I never got to use (eclipse cookies, for one) but there just wasn't enough time! Maybe for the eclipse in 2024 we'll use them. Or in 2045! Will I still be homeschooling in 2045! Ha! It feels like it. But since Ezekiel would be…let's see…28? by then—let's hope I'm taking a well-deserved rest.
This yardstick model was fun and easy to make. You can find the instructions here. You make a clay ball for the earth, and another ball, 1/4 of its size, for the moon. You clip them on the yardstick 30 inches apart. Then you use sunlight (or electric light) to make the moon cast a shadow on the sun. I really liked this because it showed how small the "dot" of totality is at any one time.
Here's another cool model, for which I got the idea here. This is an illustration of why the moon phases appear the way they do on earth, which is something that seems simple, and I've thought I understood long ago—but when I actually tried to think it through, I couldn't explain it satisfactorily. This model makes it perfectly clear that it is our perspective, looking "out" from earth, that causes the different phases.

As you can see by looking at the black foam board, from above, the moon always faces its same side toward the sun. The same side is always lit (represented by the white sides of the ping-pong balls). But when you stick your head in the hole and look outward, you see the perspectives I pasted around the black foam board (on the photos with words). I just stuck my head in and took pictures as I turned around so you could see: crescent, half, gibbous, full, and new moon. It's also pretty clear from this model why a solar eclipse can only happen at New Moon, and a lunar eclipse happens at Full Moon. 
If you want to reinforce the solar/lunar eclipse difference, you might like these worksheets we used for diagramming them. (Scroll down a bit to this picture:)
Sebastian also used this foam board model to show how the solar eclipse worked. He just moved the camera around to make the moon block out the sun in successive stages. The eclipse we saw had the moon moving from right to left across the sun, as Sebastian showed above (compare with this picture below):
Only it was really more of a diagonal, starting in the right upper quadrant of the sun and moving downward. [Time proceeds, in this picture, from left to right.]
We had a surprising amount of fun (considering that we aren't, ahem, all preschoolers) doing this fiery sun painting project. Instructions are here, and it's really easy: just cut out a white circle and squeeze blobs of warm-colored paint on it. Then wrap the whole circle with plastic wrap (covering the blobs of paint). Squish it around with your hands and fingers to make fiery suns! Then paste the suns onto dark paper and add flares and prominences if you want.
I think Teddy's sun (above) was my favorite.
We made our moon phase cookies again, using homemade "Oreos." These cookies are way better than real Oreos, in my opinion. The recipe is at the link above.

We had done these before during our Solar System Unit.
Another good thing we did during our mini-unit was make these eclipse T-shirts! (This picture was taken at Bear World in Rexburg, where we watched the eclipse.) I think they're so cute, and they were so easy! I cut out contact-paper circles (smaller for the smaller shirts and bigger for the bigger—I used bowls or plates to trace around) and stuck them onto the fronts of the black T-shirts. Then, using glow-in-the-dark fabric paint, the kids painted lines and rays out from the contact-paper circles. You can use the paint squeeze-bottle itself, or help it along with a thin brush. We did both.

The clear glow-in-the-dark paint was quite pale, so we made it pretty thick so it would show up even when NOT glowing. And I like the whitish color of it. But Abe used yellow on his, and that looked good too, and a couple of the kids just put in yellow accents with their white paint. (The girls would have used pink and orange paint if I'd let them—that probably would have been cute too, but I wanted them to look accurate!:)) You really can't mess these up! After the paint dried, we just peeled off the contact paper, and were left with a nice neat circle of "moon," with the beautiful glowing corona of the sun radiating out around it. 

We wore these (of course) on eclipse day and other times on our trip, and lots of people noticed the kids' shirts and complimented them. And the shirts, my children tell me, really did glow during totality! 
Here's a better look at the shirt
Teddy's had yellow and white on it
This is a picture Seb drew of the eclipse after we got home.
I read that we would be able to see planets during the eclipse, and we did! You can see one of them (Jupiter?) in the picture above. It was so cool!

Well, I must admit that the BEST part of this unit was seeing totality, and nothing else can compare! But I think it would be a pretty fun unit even if you were just going to view a partial eclipse. Here is my Pinterest Board for this unit:


Maybe I'll be updating it in 7 years! :)

Monday, June 19, 2017

Oceans and Coasts Mini-Unit Schedule and Lesson Plan

It's always fun to do a little studying about a place before you go there, so even though we didn't have much time to spare, we squeezed in a quick mini-unit about Oceans and Coasts before our summer trip to Oregon this year. I was glad we did, because—I don't know what it was, maybe it was just the fact that we were staying by a bay where the tides were very obvious, or maybe it was because we'd read a bunch of books about them—but the tides and tide pools were fascinating to all of us in a way they haven't been before. I could have sat by the upstairs window of our rental house and watched the patterns of the tide ALL DAY. I loved hearing the difference in sound when the tide was in versus when it was out: crashing waves when it was high, and quiet lapping (thanks to a sandbar that shielded the bay somewhat) when it was low. Beautiful.
We mostly read lots of books for this unit, as there was preparation and packing to do, but we did do a few fun activities.

One was making these ocean layers bottles. Here is one version (probably better than the one we did—but we've done this one before to learn about density, here) and here is another more like we did this time. They're so pretty!
I let the kids make models of the ocean layers on Cookie Pizza. We used pictures like this for reference. (If something can be modeled on a cookie, we will model it.) Here's our favorite recipe for Cookie Pizza (it's basically just sugar cookie dough, although occasionally I use snickerdoodle dough instead). We made frosting of different shades and then the children used chocolate chips and whatever else we could scrounge up to make fish, seaweed, phytoplankton, and so forth. Obviously this would be cuter if you used Swedish fish or something.
We totally overcooked this one. It should be much paler. But the children ate it anyway. Note the deep, dark Mariana Trench at the bottom right of the picture. Also the condensation, forming clouds above the ocean.
That big chocolate candy in this representation is a blobfish. My children were very taken with the blobfish when we learned about it. Though, it probably should be a blue whale if we are taking the scale of things into account. Of course, this isn't the whole ocean…just a cross section.
I like the white bioluminescent fish down in the deeper layers of Abe's ocean.
A few more things we enjoyed:

This page about tides, and also these. Here are pictures of our visits to the tide pools during this Oregon trip.

A couple of our books trotted out the "floating island of plastic" myth. Here are a couple sources debunking that. Too bad this hyperbole risks obscuring the real problem of ocean litter.

We'd never heard of "Velella velella" or "By-the-wind-sailors" before (they're sort of like tiny jellyfish) but we enjoyed these videos of them washing up on Oregon beaches!

Bioluminescent Plankton (more on bioluminescence here with our Light Unit)

Short video about puffins (we like puffins)

After we saw clams squirting on the beach at Netarts Bay, we got really curious about them (we've never seen live clams before!) and found these videos.

We also got interested in sand dollars (we'd never really thought about what, exactly, they ARE!). Junie found a spinier one on the beach and we wondered why it looked different—the video says how you tell if they're alive or dead.

Here's my Oceans Unit Pinterest Board