Showing posts with label magnetism. Show all posts

Monday, May 24, 2021

Electricity and Magnetism Unit Study (II)


I decided it was time for another Electricity Unit mostly because Teddy had been asking me tons of questions about electricity, and has also been very fascinated with/scared of (those two things often go together) lightning lately. It was funny to realize that the girls haven't learned any of this either, since we last did this unit in 2014. Malachi claims to remember everything, but he was only 6, so I'm not sure I believe him. But he was like Teddy back then—very curious and inquisitive and serious about learning, and a FULL participant in everything we did, so maybe he does remember!

I also feel like I did a more complete job on this unit the previous time through. Abe and Seb both understood a lot about electricity already, and helped me figure out a lot of things! And they were very excited and eager to do all the activities, which is always helpful. I was surprised how much the girls liked working with the snap circuits, etc., too this time—but they weren't AS fanatical about it as the boys were back then. I think this subject was just of particular interest of both of those older boys!

Here is the pinterest board from 2014, with perhaps a few pins added this time: https://www.pinterest.com/marilynnielson/electricity-and-magnetism-homeschool-unit/
A good place to start when talking about electricity is with the structure of the atom, and by explaining how ions work. Here are the children playing the "pass the electron" game (we do something similar to this one: https://www.nationalgeographic.org/activity/circuits-friends/print/)

Here are some explanatory videos we watched:


Luckily, we still had most of our electricity and magnetism supplies from last time. They're great to have around for homeschool in general. Here's the list of supplies I made last time, and links to where to get things. Annoyingly, some links are broken, but a google search for that item usually yields lots of choices.

Here are some other videos we used:

Intro to circuits (beware annoying narrators): https://www.generationgenius.com/videolessons/electricity-and-circuits-video-for-kids/?gclid=CjwKCAjwhMmEBhBwEiwAXwFoEW1-Ub4d055l4boFmt-kvSXoab4mptqupBftaK02wHecFK9qWMYfRhoC76IQAvD_BwE 
Slow motion lightning strikes: https://www.youtube.com/watch?v=KO3H285CFRo

You can learn a lot just by playing around with making your own circuits. The children had a lot of fun doing that in an open-ended way with all the supplies we had. Snap circuits are, of course, fun too, but they don't have the immediacy of a real circuit with a bulb and battery you add in yourself. 

And some further study of switches and resistors: https://nielsonschool.blogspot.com/2014/04/resistors-and-switches.html. That link includes an explanation of three-way switches, which I had forgotten and had to relearn this time. Here's Daisy giving another explanation of it:
And a few more resources:

• Make a three-way switch https://www.youtube.com/watch?v=6_TpKdYeQaU
Making a homemade light bulb is always fun! It's so dramatic when it burns out.
Or you can refer to these pictoral instructions: https://www.wikihow.com/Make-a-Light-Bulb
We talked about batteries and made a voltaic pile. (You can also dissect a battery—see that same post)

See also:
Success! The voltaic pile powered our LED.
I remembered that we all enjoyed making these slider cards last time, so we did that again. (Video tutorial here: https://www.youtube.com/watch?app=desktop&v=aurnw8C1aUc) The subject of the slider card was supposed to be something to do with electricity. Let us see if the children followed these instructions. Junie made a cool lightning storm.
Daisy showed a circuit working and explained how it worked.
Goldie drew…the Teddy Bears' Picnic?
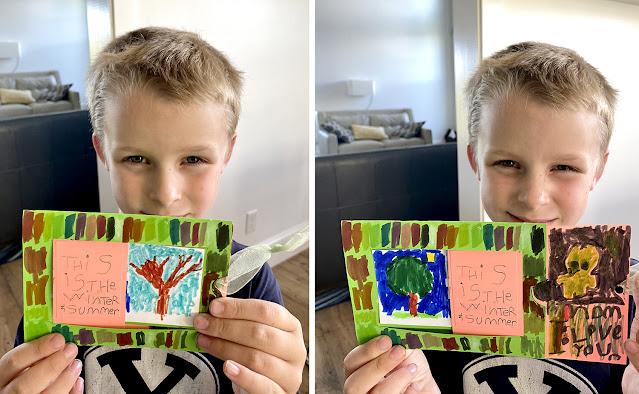
And Teddy drew…a tree in summer and winter (plus a green bunny and an "I love you" for me. Sweet.)
Cleaning pennies is a cool demonstration. We also did a simple form of electroplating that was a little different than what we did last time. We had a buy a copper pipe at the hardware store to get our copper ions off of. A few weeks later, that pipe turned out to be the exact right size to replace a towel bar that had broken in one of our bathrooms. How lucky! :)
Some of our electroplated coins
Resources: 
• How Electromagnets work https://www.youtube.com/watch?v=cxELqN7wjS0
We also tried our hand at making paper circuits with copper tape. 
It was surprisingly tricky to make the circuit complete AND make it fit with the drawing you wanted to do! Daisy made a glowing penguin.
Teddy made a green-eyed bunny.
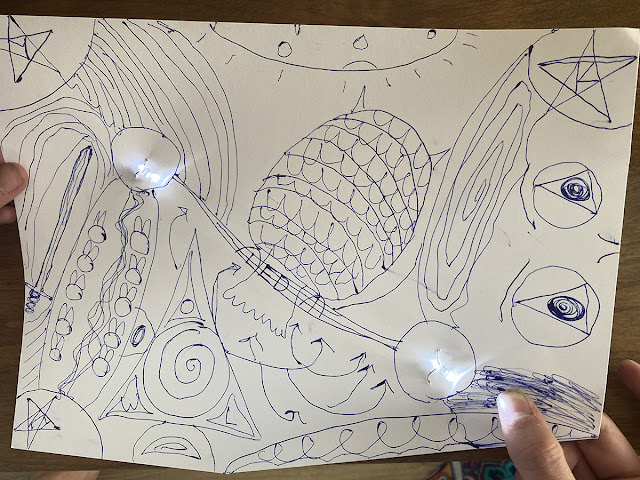
Malachi made…this
Junie made this terrifying monster
And Goldie made a really cool lightning storm!
Here are a few more links for studying magnetism:

Thursday, May 1, 2014

Electromagnets and Motors

It's pretty easy to make a simple motor. We got excellent instructions here. As you can see, it's just made of a battery, two safety pins (which act like wires to conduct electricity from the battery to the magnet wire, but serve the added purpose of having holes for the wire to spin through!), a coil of magnet wire, and a magnet. We used clay to hold the battery in place.

I would add, to the instructions linked above, that you should make your coil of wire by wrapping it around a size _C_ battery (not D)---otherwise it will be too large in diameter to turn freely. 

You also need to make sure to only scrape off the wire coating on half of the wire's diameter. In other words, the copper wire that goes through the safety pins will only be in contact with electricity for half the time--as it spins, the coating and the wire itself will take turns contacting the safety pins. This is essentially your commutator, allowing the direct current of the battery to alternate its path into the coil and thus keep the motor spinning.

Once you get it going, it should spin on its own for quite a while, and you can stop or slow it by bringing magnets close to the coil. It's really fun to play with.

We also made an electromagnet that could pick up paper clips when the current was flowing, but not when the circuit was broken.

More motor and generator stuff:


I think I linked this elsewhere, but we liked this information on AC vs DC motors

And this is a good video on the induction motor.

This generator project looked pretty fun. (Here is our previous, ill-fated attempt at a hydropowered generator--maybe taking out the hydropower component would make things simpler and less liked to go wrong!)

Here are Abe's and Seb's diagrams of how motors/generators work:
And the one we made all together

Wednesday, April 30, 2014

Maglev Train

This magnetic-levitation train was made with this kit. It was a fun project for an afternoon, and the children were really pleased with it!
It levitates! Hooray!

Tuesday, April 29, 2014

Making 3-D Magnetic Fields

If you mix iron filings with baby oil or vegetable oil in a quart jar, shake the mixture very well, and then hold a magnet near the jar, you can see magnetic fields in 3-D! It's really cool and we played with it for a long time. (It's a bit tricky to clean the jar afterwards, but if you let the filings settle, pour out most of the oil, and then wipe the jar out with a paper towel, you can avoid getting most of the filings into your sink drain.)

Different kinds of magnets make different fields! It's fun to experiment with.

The little ones loved it too.
Stronger magnets pull more filings into their field!

Monday, April 28, 2014

Magnet Play: 2-D Magnetic Fields, Magnetic Art, Making a Compass

Making your own compass is fun and easy---you just need to magnetize a needle. Do this by stroking a magnet in the same direction 30 or 40 times along the shaft of a needle. Poke the needle through a square of tissue paper (to give it more surface area, so it will float---it needs to be able to turn freely, with little resistance or friction) and float it on water. It will turn until it's pointing north. You can check it with an already-made compass, or by bringing magnets close to it to make it turn around.

You can also make a visible magnetic field by putting a magnet underneath a piece of paper and sprinkling iron filings on top. These are so beautiful!

And there are lots of other fun ways to play with magnets too.

We also made magnetic art, with moving parts controlled by magnets. The children drew a picture that needed motion (Seb and Abe made trains, Ky made a sun orbiting another sun) and attached a paper clip to the back of the part that needed to move. Then they could move it around "magically" by using a magnet behind the picture.

Tuesday, April 15, 2014

Electricity and Magnetism Supplies

For this unit, we had some of the basic components we needed on hand, and I ordered a few more. I was wishing someone would tell me all the sorts of things I would need so I didn't have to figure it out myself, and so I wouldn't be caught without something we needed. For that reason, I give you this list. You can pull batteries out of flashlights and improvise bulb holders, etc., but if you're a beginner and need guidance, I think the following things made up a pretty good basic electricity exploration set:

Alligator clips--get several so you can make different kinds of circuits
Tiny light bulbs--These work well with D batteries as the power source, and light bulbs are the easiest way to test if a circuit is working or not! Again, getting several will let you construct parallel and series circuits, etc. Also, it's nice to have extra in case you burn some out.
Bulb holders--Not totally necessary, but so much easier than holding or taping the contact of the wire to the bulb base!
Insulated copper wire--Nice and safe, but you'll have to scrape the insulation off the ends for your contact points. If you have the right tool (wire stripper?) it's probably fine, but we didn't. I finally used a butter knife (too sharp of a knife will just cut the wire!) to scrape-scrape-scrape, and that worked pretty well.
Bare copper wire--sometimes you want bare copper wire, like if you're making a dimmer switch and want to be able to connect the circuit at any point along the wire.
Magnet wire--good for making motors
6-volt battery--I like this because the terminals are so accessible and easy to clip wires to! 
D batteries--It's good to have a bunch of these on hand
Carbon-zinc batteries--safe for dissecting!
LEDs and resistors--fun to use in circuits, but because they use so little voltage, you sometimes have to use the included resistors as well (a 9-Volt battery will burn them out instantly)
Mechanical pencil lead---for a homemade light bulb

For exploring magnetism, any old magnet will do, but we also found these supplies really fun:
Iron filings--for sprinkling on paper or putting into oil to make magnetic fields visible, or just for giving your magnets funny furry beards. They're kind of messy but SO fun! And much easier than the "steel wool shavings" many instructions suggest substituting
Basic bar magnets--marked with North and South Poles
Horseshoe magnet--stronger than the bar magnets, and makes a different kind of field

I generally think getting things in "sets" is a waste, since they inevitably include things you don't need/don't like/are flimsier than you would have gotten separately---but these both looked pretty good, so we also got these two sets:

Motors and generators kit--because making the coils of wire big enough and sturdy enough to work in a generator is pretty hard, and this has that part done for you. You can see how the motor and the generator work in reverse of each other, and the magnets snap on to the sides so nicely. We thought this kit was very easy to use, while remaining useful because you can tell what's going on!

Maglev Kit--This probably could be made without a kit, but there was no way _I_ was going to be able to figure out all the components. And because my children LOVE maglevs, and had been wishing and wishing to make one during our Train Unit, I thought this kit would be worth our while. The maglev was really fun to make, and although it needs some adjustment to run perfectly (sanding off the sides, making the weight balance perfectly, etc), the process itself is fun enough to be worth it.

Also contact cement--you need this to go with the Maglev Kit

We also have (and love) this Snap Circuit set---and there are lots of other sets that look fun too! Someone gave us this one specifically about electromagnetism, and it's fun, but not that great on its own. I'd recommend the set above instead, because it does a lot more.

Thursday, April 3, 2014

Electricity and Magnetism Unit Schedule and Lesson Plan

The children really, really wanted to learn about electricity, so I finally buckled down and planned this unit. It seemed like a really overwhelming subject to me at first (and it is, even if you're just doing the basics like we were), but it got easier as I went along. I realized as I was preparing that electricity and magnetism really go together, so the Electricity Unit grew into an Electricity and Magnetism Unit. All the better! We love magnets. :)

Here's a list of most of the materials you need for this unit, plus links to buy them online.

Below are some electricity and magnetism resources that didn't fit anywhere else. You can also look at my Electricity Unit Pinterest Board.

I really had to do a lot of reading before I FINALLY got it straight in my mind what the difference between volts, amps, ohms, and watts is. Here are some resources for that:

http://science.howstuffworks.com/environmental/energy/question501.htm

http://www.candlepowerforums.com/vb/showthread.php?9200-Amps-vs-Watts-vs-Volts

http://www.ducksters.com/science/electricity_102.php---some good electricity basics

http://www.physics4kids.com/files/elec_current.html

Robert Krampf's electricity show is really fun (subscription required---it's worth it! We love Robert Krampf and use his site all the time)

We loved this interactive animation for helping us understand AC and DC.

And here's a video that talks about the differences between AC and DC, and the contributions of Edison and Tesla to each.

LOVE this video explaining transistors and semiconductors. So clear!

Building a telegraph looks fun---we did something similar with the snap circuits. This could go with a lesson on the transcontinental railroad, too.

We spent a day talking about electricity in animals (we had some good books on the subject) and this article was interesting too.

And here's a short video about electric eels
Seb's illustration of the electromagnetic spectrum

Related Posts Plugin for WordPress, Blogger...