Showing posts with label origami. Show all posts

Tuesday, September 6, 2016

Other Insect Crafts

We made a whole hive-ful of origami bees one day. We used a book from the library that had patterns for several origami insects, but you can find some similar instructions here. Here are some harder origami insects you could make. Maybe we'll attempt those sometime.
We made dragonflies by coloring clothespins with sharpies, and then gluing waxed paper wing shapes inside the clothespins. They went fast and were quite fun to make. There are lots of variations of this craft online--I liked that we didn't have to get out the paint for ours. :) But this one with pipe cleaner wings is really cute, as is this one.
Daisy had to make matching mommy-and-baby ones with some tiny clothespins, of course. :)
This is a little model of how insects move their wings: not by muscles within the wings themselves, like birds, but by contracting and flexing their thorax to make the wings vibrate. There is a lesson plan, and instructions for this model, here.

Wednesday, November 4, 2015

Monkey and Ape Celebration

We had a great time with our end-of-unit Monkey and Ape celebration. All the household monkeys (and apes) were invited.
We hung up some vines (a plastic tablecloth which Seb cut into strips).
And we had a lovely monkey-themed dinner. (Don't forget the banana-chocolate smoothie! We forgot to put it on the menu, but we did NOT forget to make and eat it.)
This banana-coconut soup was really good. Interesting foreign flavors (it reminded me of the curried groundnut soup I sometimes make, which is an African recipe. This one was Vietnamese, I think). I found the recipe here. Here's another version that looked good.
I had made this style of monkey cupcakes years ago, for Seb's birthday. They're cute (although for some reason, in this picture these look to me more like dogs than monkeys!) This time I tried a peanut-butter banana cake recipe. I did plain peanut butter instead of chocolate/peanut butter for the frosting, though. 
Abe made monkey cups to hold our drinks. We found this idea here. We also printed out these little paper monkeys to cling to some bananas, for decoration.
After dinner we did some games and activities, and then watched "Monkey Kingdom." We liked it. There are lots of good monkey-themed party games—here are two.
We had an origami station. The pattern for the gorilla is here.
We made a whole troop of gorillas!
The nut-cracking station was a big hit. We cracked open walnuts and almonds the way some monkeys do it, between two big rocks! (This is another way monkeys use tools.)
Daisy-gorilla
It was a fun Monkey Celebration and a fun unit! Perfect for a family of little monkeys.

Thursday, May 28, 2015

Handmade Japanese Paper Lanterns

When I think of Japanese lanterns, the round or oblong ones like this come to mind first, but when I saw this tutorial showing how to make these really simple paper lanterns, I knew it would be a good project for the little girls. And it was. Really, sitting and cutting the lanterns was quite fun for all of us, but since Daisy and Junie were able to do it all by themselves, I think they were the most excited about it. The good thing about it being so simple is that even when the cuts were sort of uneven or crooked, the finished lanterns still looked good. That's a recipe for a successful kindergarten project. :)

We strung our paper lanterns (one string of mini-lanterns made from origami paper, one string of big lanterns made from 12x12 scrapbook paper) across our living room ceiling before our sushi party, and it gave the house such a fun, festive feeling. Then we left them up for the rest of our unit and enjoyed having our school area feel so Japanese and celebratory. They looked so pretty we hated to take them down at all!

In case you've forgotten from when you (inevitably) made these in elementary school, here is how to make this kind of paper lantern:

1. Fold a piece of paper in half. You can use square or rectangular paper; each will just give you a different lantern shape in the end. If you're using paper that's only decorated on one side, fold it with the colorful side facing out.

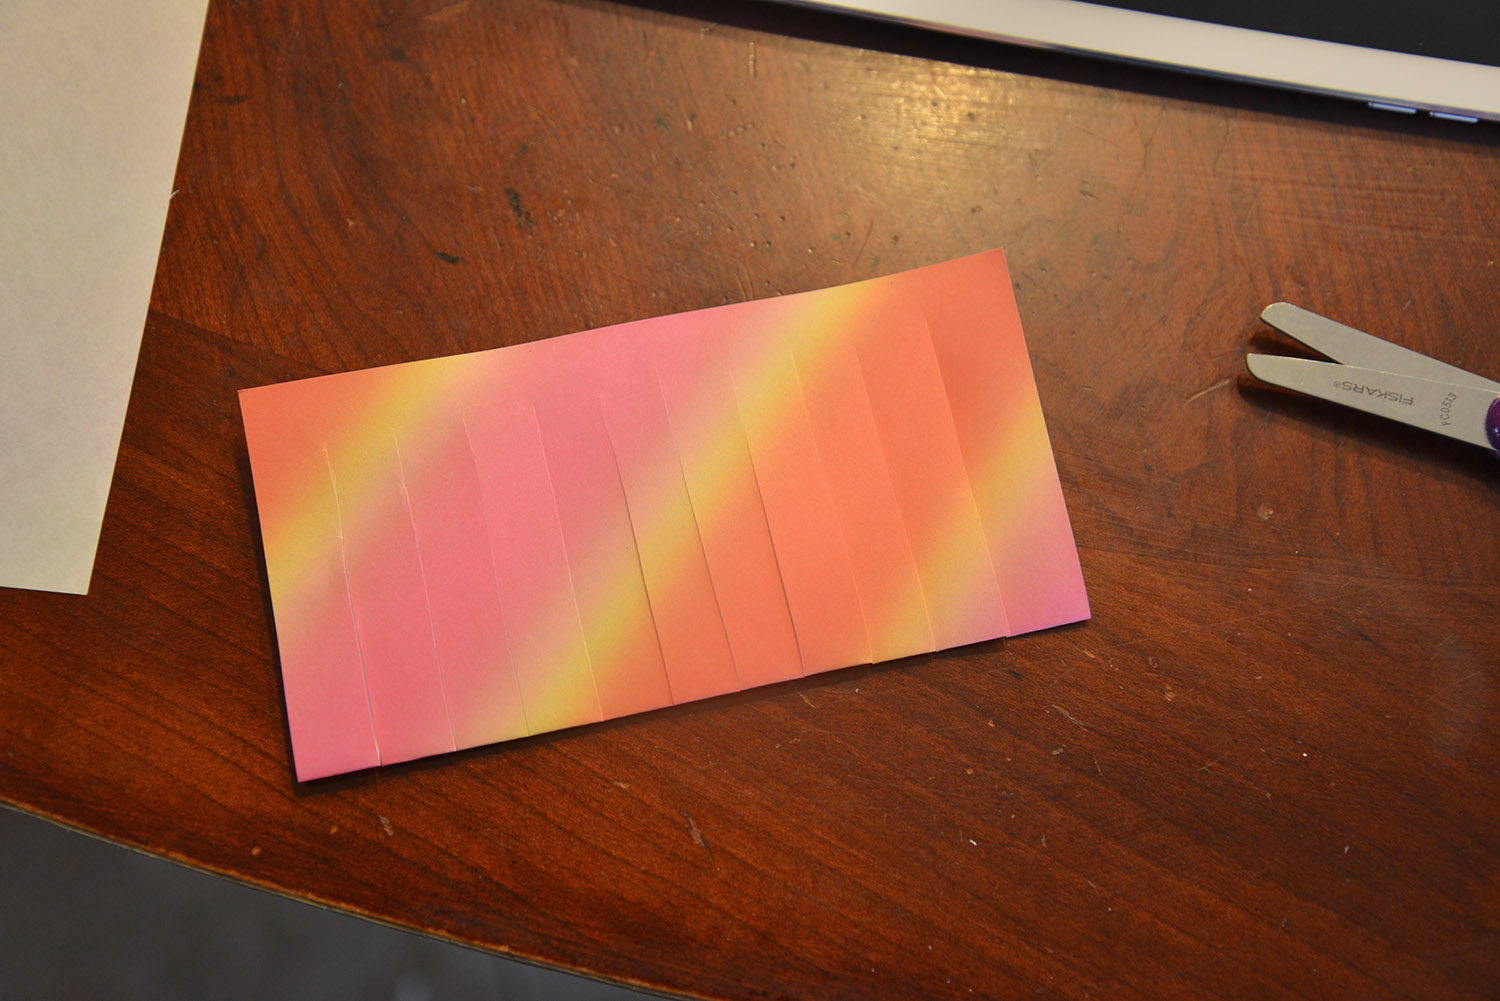
2. Make cuts all along the folded side of the paper. Don't cut all the way to the top; leave about a half-inch margin so you end up with a bunch of thin strips connected together:

It doesn't really matter if your strips are varying widths (in fact you can experiment with different widths to see what you like). Just make sure not to cut all the way through.

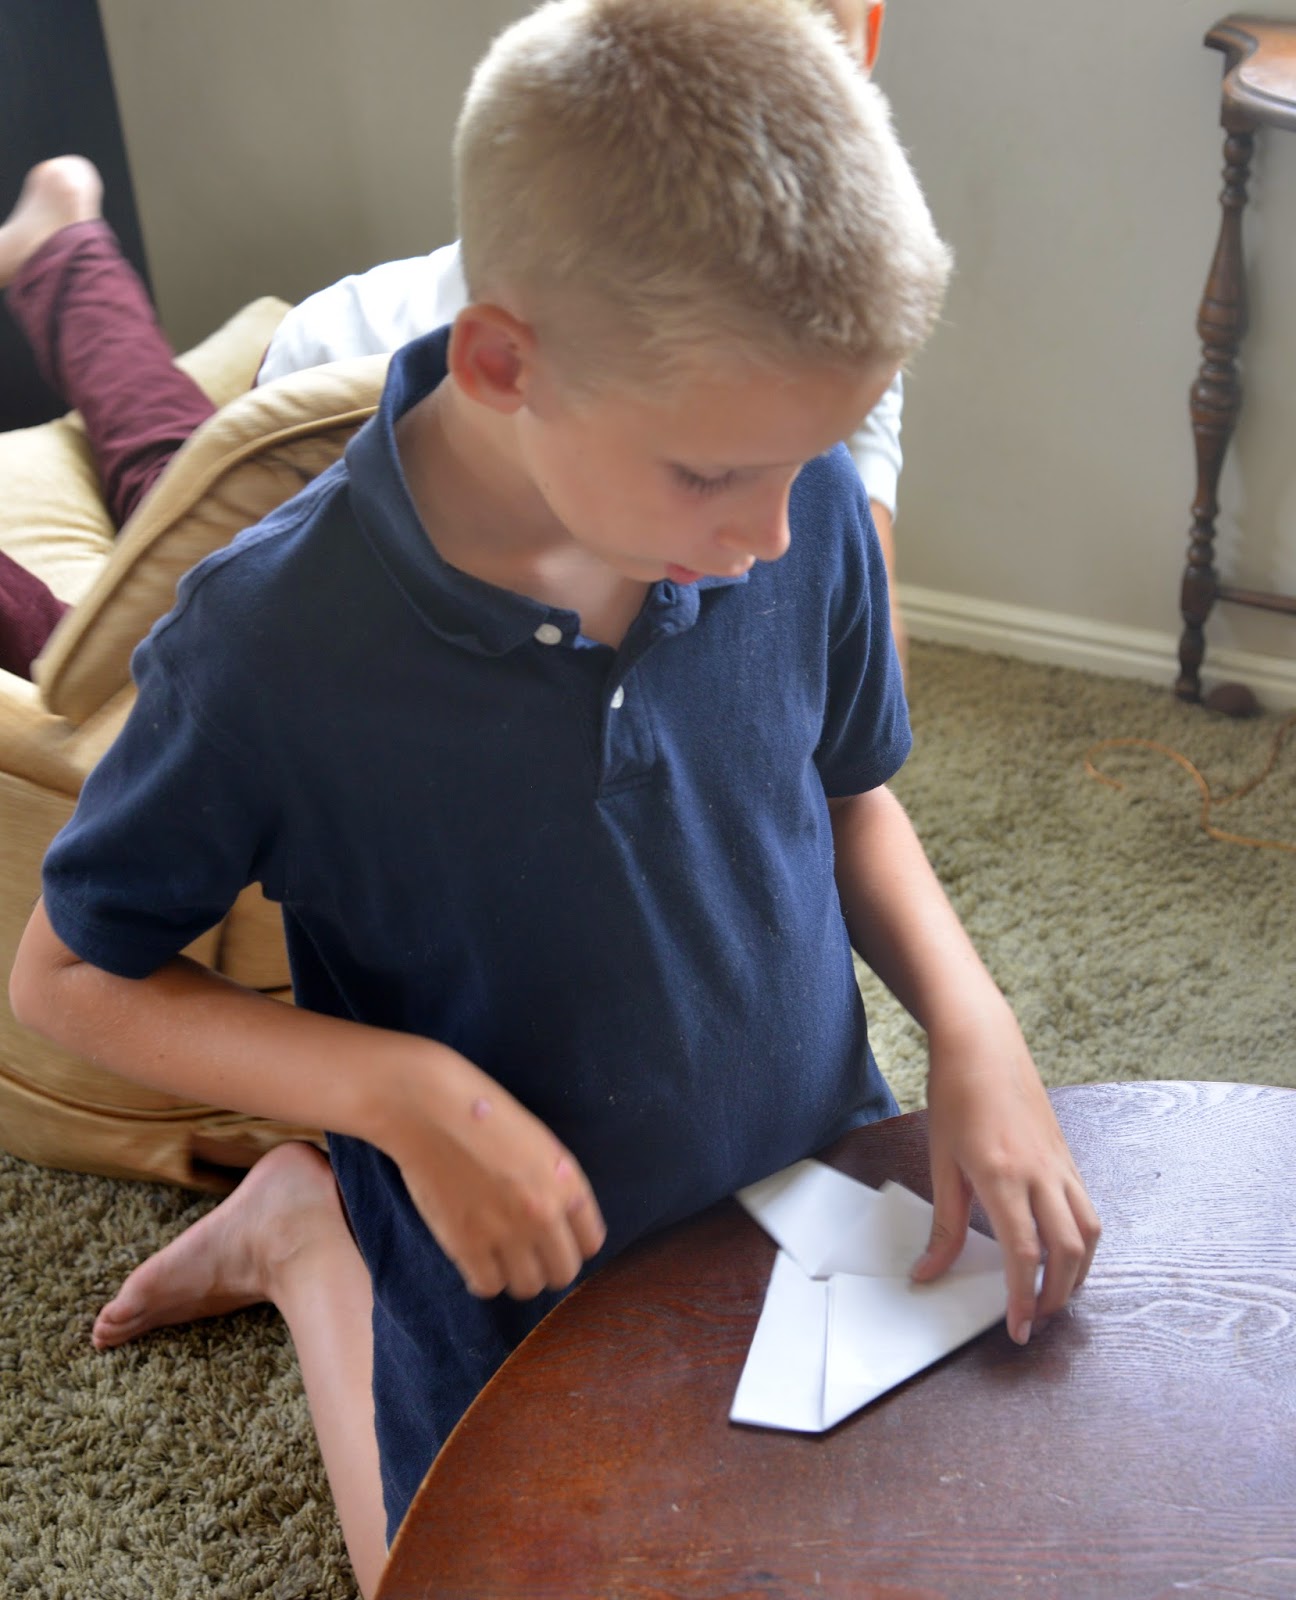
3. Open the paper up, turn it ninety degrees, and roll it into a tube shape. Connect the ends with a staple or a piece of tape.
And that's it! Malachi and Daisy ended up doing a presentation on Paper Lanterns for their 4-H Demonstration Contest, so they learned about all kinds of variations. You can punch holes for stringing lanterns together; you can add handles and decorative stripes; you can roll up a constrasting paper cylinder and stuff it inside to make the lantern look like it's glowing; and so forth—but the paper lantern at its most basic still looks lovely. I love the effect of a whole string of them in rainbow colors!

Wednesday, May 27, 2015

Japanese Origami; Origami Field Trip

Our favorite origami resource was a documentary about origami, called Between the Folds. If that link doesn't work (we found it on YouTube), type it into a search engine and find it elsewhere, because it was amazing. We loved it! There are so many uses for origami, from astronomy to medicine. The wet-fold techniques are fascinating. We definitely recommend watching this one!!

This is another fascinating video about origami in Japan.

By happy coincidence, the BYU Museum of Art had an Origami exhibit going on during our Japan Unit too, so we took a field trip to see it. We weren't allowed to take pictures of the exhibit, but there were amazing pieces like this one:
and others that you would never believe could be just folded or bent paper. Really cool to see. The children loved it and so did Sam and I.
And at the end of the exhibit, there was a station set up with iPads and step-by-step instructions for how to fold your own origami. The interface was pretty simple, so Malachi (age 7) could do it mostly by himself, but Daisy and Junie (age 4 and 5) needed my help. It was really fun; I could have stayed there for hours making things.
Some of our origami creations
We also got to see this Brian Kershisnik painting I've always really liked, so that was nice. And there was another exhibit upstairs called Deco Japan (about the Japanese Art Deco movement) that we really loved as well.
At Cub Scouts, Sebby learned to make these modular origami balls out of twelve folded sheets of paper. They look really cool. The children have made several, out of various colors and papers. There are detailed instructions for how to make them here.
A few other relevant links:


An origami robot that folds itself and walks away!


A picture of millions of paper cranes at the Peace Park in Hiroshima.

Thursday, August 7, 2014

Betsy Ross's five-pointed stars

I know Betsy Ross is one of those semi-apocryphal characters that books always feel inclined to give you caveats about ("of course we have no proof that Betsy Ross did indeed make the flag, or even knew George Washington" etc etc)—but come on, how can we leave out Betsy Ross and the flag from a study of the American Revolution? I love her story and have ever since I was little. And there were some great pictures books about her at the library.

Anyway, my favorite little detail (yes, yes, probably also apocryphal) is that George Washington wanted 6-pointed stars because he thought they'd be easier to sew. So little Betsy got out her scissors and showed him how she could cut out a five-pointed star with just one snip! Awesome, right?

Here are the instructions for how to do it yourself. Or this animation is good too.
I thought it was cute how pleased with themselves the children were after mastering this simple little thing. It IS pretty cool!

Tuesday, January 7, 2014

Bunny Origami

Or Bunnigami, as I prefer to call it, but I try to keep my titles more straightforward in case someone is searching for this. :) We found this simple little folded-paper bunny pattern here, and after a couple tries even Malachi could fold one by himself. We found three ways this bunny can take shape:
Just the head
Side view
Front view, whole body (this is particularly cute because the back has a little folded-up tail!)
Speaking of which, did you know bunnies' tails really aren't balls? They're more like fluffy triangles. I never knew that, until we had a bunny to examine!

Fun! We liked this project!
Related Posts Plugin for WordPress, Blogger...