Showing posts with label sedimentary rock. Show all posts

Tuesday, May 24, 2016

Sediments and Erosion

Somehow in all my years of studying geology, I never understood that clay and silt and sand are simply names for materials composed of different sizes of sediment! We collected samples of each type and sorted them onto a plate, and then looked at them under the microscope.
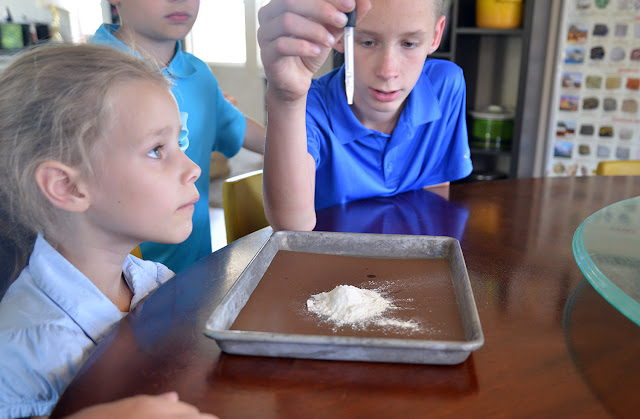
Here's what sand looked like. Cool, huh? Like teeny pebbles. Which, of course, it is!

We also looked at how weathering and erosion affects different sediments. 
You can see, as we dropped water on our "mountain," the water wore away at the slopes, and formed river channels where it "preferred" to flow. You can also see the deposition of sediment at the bottom of the "mountain."
Wind plays a part in weathering and erosion as well.
Eventually, the mountain is all worn away and the sediment has been deposited throughout the flood plain.
We looked at different sizes of sediment too. The water, obviously, had less of an effect on large "boulders" than it did on smaller sediments.
After flooding the sediments, they mixed and settled. Then we allowed the water to evaporate for a few days, and when it was gone, we had a "sedimentary rock" composed of the old sediment.

We also repeated an activity we've done before, where you put different sizes of soil/sediment into a bottle, add water, and shake it up. The sediments mix and then settle to the bottom in layers sorted roughly by size. It's cool to see it work.

More sedimentary rock activities—here.

Wednesday, October 9, 2013

Chocolate Rock Cycle

Now, to put all this information together in the Rock Cycle! There are lots of ideas online about how to simulate the rock cycle. You can use crayon shavings, but we used three types of baking chips---chocolate chips, peanut butter chips, and white chocolate chips.
You can start the cycle at any point. We started by "weathering" various rocks and minerals (the baking chips) into smaller sediment. We used graters, paring knives, and a microplane grater to do the weathering. You want some very small pieces, and some larger pieces, of each type of baking chip.
Sprinkle a little bit of each type of sediment onto a piece of foil. Wrap it up tight and then add some pressure. You can squeeze it tightly between your hands (this adds a bit of heat) and then stand on it. Put a book on top to distribute your weight evenly.
Unwrap the foil to see your sedimentary rock! Each person's "rock" will be a bit different, based on the rocks and minerals that it is composed of. Be careful when handling these rocks because they are quite fragile.
Now add more heat and pressure to make a metamorphic rock. We re-wrapped our rocks tightly in the foil and then floated them on some hot water for 10 seconds or so. (You don't want to melt the chocolate completely.) Press the foil between your hands again to add more pressure. Then put the rock (in its foil packet) into the refrigerator to harden for several eons (10 minutes or so). :)  Unwrap it to see your metamorphic rock! You can observe, at this point, that some of the "minerals" making up the rock are more melted and disfigured than others. This is true to nature, as different minerals have different melting points and will also re-crystallize at different temperatures.

Igneous rocks are next. Take your metamorphic rock, re-wrap it in foil, and float it for a longer time on some hot (even boiling) water.
Sometimes a little bit of water leaked into our foil "boats." It's okay.
Unwrap, take a toothpick, and stir the melted rock and minerals around. This is "magma," and you are creating convection currents in it.
Refrigerate the rock again until it's hard. Now you have an igneous rock! The minerals are still present, but you can no longer see them as individual components because they all melted together in the magma.

We LOVED this activity. It is simple and yet it models the process so well!
Sebastian's illustration of the rock cycle

Saturday, October 5, 2013

Thanksgiving Point Dinosaur Museum Field Trip

We found a great deal on Groupon for these passes, so we'll be going to several museums for field trips this year. We visited the Dinosaur Museum at Thanksgiving Point after we studied fossils. It's been several years since we've been there (the littler children have never been) so it all seemed fresh(er). There are lots of activities for the kids to do there.
I have a picture of Baby Abraham being eaten by this shark!
Unrelated to fossils, but they had one of those shadow-capture screens where it freezes your shadow on the wall. So fun.
Big bones!
The erosion table is always a favorite (and this is always the spot where I sit and nurse the baby while the older children play) :)
Fish fossils
Seb looking nervous about the huge sea turtle

Friday, October 4, 2013

Paleo-cookies, Fossil skeletons, and Casts and Molds

This paleo-cookie idea is from Robert Krampf. It helps demonstrate the difficulty of identifying and assembling fossils into skeletons. First, you break up a cookie into a few pieces. Then you try to reassemble it.
It's pretty simple at first, but you can make it successively harder. You can break each piece into two pieces, and then eat a couple of the pieces. Can you reassemble the cookie then? Next, try getting out another cookie and breaking it into pieces also. Mix the pieces of the two cookies together. Now can you reassemble each cookie into its original form? A paleontologist's work is trying to do this on a much larger and more complex scale!

For a variation on the same theme, use this pdf and script that has you assemble paper fossil bones into a skeleton. You don't know what kind of animal it is, and you have to just guess based on the few bones you have!

We also did this simple model of a cast and a mold. Press a shell into some playdough. The indentation you create is the mold. Fill the mold with white glue and let it dry.

When the glue is dry, peel it off. It should be formed into the same shape as the original shell you used. This is the cast, formed from the mold. Fossils can be formed by both of these methods.

Thursday, October 3, 2013

Jello Fossil activity, Petrification, and Permineralization

As I prepared to teach about Sedimentary Rocks and Fossils, I was trying and trying to think of an activity that would teach about permineralization---the process during which minerals seep into the pores of dinosaur bones (or other materials) and harden, creating a hard, rock-like fossil. (As I understand it, Petrified wood and other petrified objects were first permineralized, and then some of the original material was actually replaced with minerals, until minerals are all that is left. Or, here is an even better explanation of permineralization versus petrification.)

(Also, here is a video about the petrified forest National Park that is quite interesting)

Anyway, the point is that I found lots of ideas for activities where you press a toy dinosaur into playdough and then call the impression a fossil, or put a leaf in plaster and paint it to look like stone, but none of them seemed very good at demonstrating the actual process of fossilization.

I was lying awake after Marigold's 3 a.m. feeding when it came to me like a flash of lightning. Jello! And ice! It was a brilliant idea. I will describe it.

So, I immediately got out of bed and went to the kitchen and filled several straws with water. I stuck them upright in a lump of clay, drizzled in some water, and then set them in an old spice jar and put them in the freezer.
In the morning, the straws were filled with long tubes of ice, as you can see.

Then I had Sam draw me a cute little dinosaur head, and I made a dinosaur. Here he is going on his merry Jurassic way.
The straws are his "bones."
The ice inside is the "organic material," like the bone marrow, etc.

I showed the children that the "bones" were solid, not hollow inside. They are just like the bones of an animal or dinosaur right after it dies.

Poor dinosaur! He was killed. His bones came apart. He fell into a lake bed.

Then he was covered by this "lake" of liquid jello. (I used this recipe for jello jigglers.) I told the children that the liquid jello represented mineral-rich water. The dinosaur bones sank to the bottom of the jello lake. (Actually, the bones were not heavy enough, so we had to put these knives on them to weigh them down. They have to be completely immersed in the jello solution.)

Next we put the jello in the refrigerator to set. This represented the long process of the mineral-rich water being compacted together with sediment, and forming into sedimentary rock.

When the jello was set, we pulled it out of the fridge and began to carefully excavate in the sedimentary rock.

We discovered our dinosaur's bones, and extracted them from the rock. We examined them. Were they filled with bone marrow (ice) anymore? They were not! The organic material had been replaced with another material---with minerals (jello), in fact! Instead of our dinosaur bones, we now had these permineralized fossil bones! (We squeezed them out of the straws to ascertain that they were, in fact, made of a wholly different substance than they had been made of at the beginning. The ice had melted and been replaced with jello!)
The jello actually proved to be a very good medium for demonstrating other fossil types as well. There were these knives, preserved intact in the substance, much like insects preserved in amber.

And there were these impressions left by the "bones," perfect molds, much like dinosaur footprints or other impression fossils.

If I were doing this activity again, I would put even more objects in the jello. It was really fun for the children to "dig" for these fossils and separate them from the "rock," and it was quite an effective way to teach the concepts of casts and molds as well. But I think the permineralization object lesson was the best part---it worked just as I wanted it to and it was a memorable way for us to remember that concept!

Sedimentary Rock activities and Geode Rolls

We spent a couple days focusing on sedimentary rock. There was a lot to cover because we studied fossils along with it. This first activity shows how sedimentary rock can be formed with heat and pressure. First, you smash up graham crackers in a bag (this represents weathering of larger rocks into sediment). Add a bit of sugar (this represents other types of sediment mixing with the earlier kind). Then you pour melted butter over the sediments (the butter represents mineral-rich water flowing through the sediment. The minerals will help cement the sediment together as it hardens).
Press your sediment into an oven-proof dish (we did individual sizes). This represents compacting. Then bake it in the oven at 425 for 5-8 minutes.

Hopefully, this will give you a "sedimentary rock" you can hold and eat! More butter (minerals) will give you a more cohesive rock. It's pretty fragile, though, so hold it carefully!

Another day, we made these "sedimentary layer bars" (recipe here, but you can adapt it---it's just a graham cracker crust, and then you layer any kinds of baking chips, nuts, coconut, etc. on top, and pour sweetened condensed milk over the whole thing). We pretended the graham cracker was compacted sand, the chips were fossils, the coconut was silt, and the sweetened condensed milk was clay and water that hardened over the whole thing to cement the rock together.

This next activity shows how nodules and geodes are formed in sedimentary rock. [A nodule, if I understand it right, happens when the mineral matter forms around a mineral lump in the rock. A geode happens when the minerals seep into a cavity.]  In igneous rock, geodes are formed by gas bubbles inside of magma. The bubbles harden and minerals seep into the cavity left, then crystallize there. That's the only type of geode I'd ever heard of before, but they can form in sedimentary rock too! In sedimentary rock, the process usually starts with a dead animal in its burrow, or a tree root, that makes a "bump" in the sedimentary layers. Over time, the organic matter decays and leaves a hollow space behind, since the rock has already hardened around the bubble. Then, as in igneous rock, mineral-rich water can seep into the cavity, and the minerals form crystals over time.

I had a perfect way to demonstrate this process, but I first heard of this activity as an Easter object lesson to show The Empty Tomb---so I felt a little bit like I was being sacreligious by making it into an activity about geology. But then, as Sam reminded me, marshmallows do not actually have any connection with Jesus' body, so I decided it was okay. :) (I still do think this is a nice activity to do for Easter and the Empty Tomb, so we may "resurrect" it [HA!] next year.)

Here is the activity:
1. You roll a marshmallow in melted butter and cinnamon sugar. This marshmallow represents a poor little dead animal. Perhaps a bunny. One that died a natural, painless death from old age.
2. Set the marshmallow on the wide end of a section of refrigerated crescent roll dough, and roll it up. Pinch the ends of the crescent roll dough around the marshmallow until it's completely covered. This represents the layers of rock and mineral that get deposited on top of the animal's burrow over time. (You can sprinkle cinnamon-sugar on the outside of the rolls too, if you want---like more sediment being added.)
3. Put the rolls onto a greased baking sheet and bake them at 375 for 13-15 minutes. This represents eons passing!
4. When the rolls come out of the oven, let them cool just for a minute, then bite into them. The "animals" have disappeared, leaving an empty hole behind! You can look in and see the "mineral crystals" (cinnamon sugar) beginning to form inside the hole.
Geode roll!

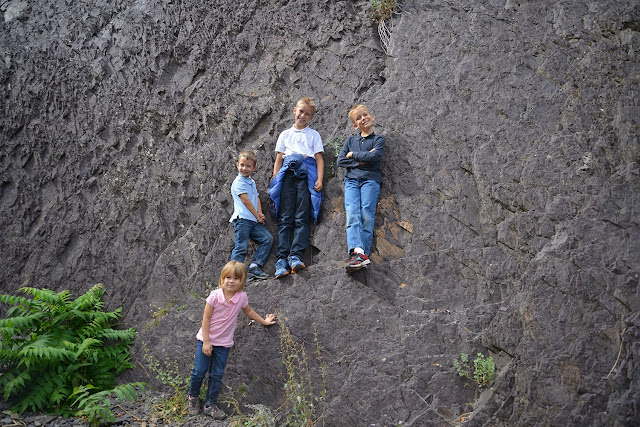
As I said before on the Igneous Rocks day, we are lucky to have easily accessible examples of all three kinds of rocks in our nearby canyons, so using this guide, we spent a day driving around and looking at these examples. The sedimentary rock we saw was shale in Big Cottonwood Canyon.
There are huge deposits of this bluish-purplish and greenish shale all along the road. It was once under an ancient sea, and you can still see marks in the rock from the ripples in the waves. It is really beautiful!
I love the colors.

Related Posts Plugin for WordPress, Blogger...