Showing posts with label waves. Show all posts

Monday, June 19, 2017

Oceans and Coasts Mini-Unit Schedule and Lesson Plan

It's always fun to do a little studying about a place before you go there, so even though we didn't have much time to spare, we squeezed in a quick mini-unit about Oceans and Coasts before our summer trip to Oregon this year. I was glad we did, because—I don't know what it was, maybe it was just the fact that we were staying by a bay where the tides were very obvious, or maybe it was because we'd read a bunch of books about them—but the tides and tide pools were fascinating to all of us in a way they haven't been before. I could have sat by the upstairs window of our rental house and watched the patterns of the tide ALL DAY. I loved hearing the difference in sound when the tide was in versus when it was out: crashing waves when it was high, and quiet lapping (thanks to a sandbar that shielded the bay somewhat) when it was low. Beautiful.
We mostly read lots of books for this unit, as there was preparation and packing to do, but we did do a few fun activities.

One was making these ocean layers bottles. Here is one version (probably better than the one we did—but we've done this one before to learn about density, here) and here is another more like we did this time. They're so pretty!
I let the kids make models of the ocean layers on Cookie Pizza. We used pictures like this for reference. (If something can be modeled on a cookie, we will model it.) Here's our favorite recipe for Cookie Pizza (it's basically just sugar cookie dough, although occasionally I use snickerdoodle dough instead). We made frosting of different shades and then the children used chocolate chips and whatever else we could scrounge up to make fish, seaweed, phytoplankton, and so forth. Obviously this would be cuter if you used Swedish fish or something.
We totally overcooked this one. It should be much paler. But the children ate it anyway. Note the deep, dark Mariana Trench at the bottom right of the picture. Also the condensation, forming clouds above the ocean.
That big chocolate candy in this representation is a blobfish. My children were very taken with the blobfish when we learned about it. Though, it probably should be a blue whale if we are taking the scale of things into account. Of course, this isn't the whole ocean…just a cross section.
I like the white bioluminescent fish down in the deeper layers of Abe's ocean.
A few more things we enjoyed:

This page about tides, and also these. Here are pictures of our visits to the tide pools during this Oregon trip.

A couple of our books trotted out the "floating island of plastic" myth. Here are a couple sources debunking that. Too bad this hyperbole risks obscuring the real problem of ocean litter.

We'd never heard of "Velella velella" or "By-the-wind-sailors" before (they're sort of like tiny jellyfish) but we enjoyed these videos of them washing up on Oregon beaches!

Bioluminescent Plankton (more on bioluminescence here with our Light Unit)

Short video about puffins (we like puffins)

After we saw clams squirting on the beach at Netarts Bay, we got really curious about them (we've never seen live clams before!) and found these videos.

We also got interested in sand dollars (we'd never really thought about what, exactly, they ARE!). Junie found a spinier one on the beach and we wondered why it looked different—the video says how you tell if they're alive or dead.

Here's my Oceans Unit Pinterest Board

Monday, March 20, 2017

Sound Wave activities and resources


Goldie feeling vibrations (from music coming out of the speakers) pass through a balloon

Some sound wave resources: 

Video about a wave machine that makes the biggest (manmade) waves in the world

Animations that show how sound is a pressure wave. When you see the waves so often simplified visually into sine waves, it's easy to forget what kind of waves they really are!

This video explains harmonics and overtones, two things I have always struggled to understand. Maybe if I were a violinist I'd have gotten it earlier!

This virtual oscilloscope is really cool

This is amazing: scientists using standing waves to levitate objects (called acoustic levitation).

And here are some beautiful patterns made with resonance

This video shows the ever-popular trick of breaking a glass with sound. You can see the waves forming in the glass in some of our pictures here,

This lady does overtone singing—or in other words, singing two notes at once! It is eerie and beautiful and amazing. I can't believe she can do this!!

Here's a video about some high amplitude sound research going on at BYU

Here are some wave activities we did as part of our Water Unit

We also investigated interference effects and other wave properties of light (part of our Light Unit)
This site will tell you how to make a string telephone. Except it never works very well, in my experience.

These pictures show an activity did where we investigated the sound-absorbing properties of different materials. (Something like this.) We stuffed various materials into containers and then listened to which were the most "muffling."

Monday, May 30, 2016

Erosion, Mountains, Rivers, Canyons

It's hard when posting about this subject, as it was when teaching it, to sort things into discrete subjects. Erosion and weathering are inextricably linked with canyon formation, and mountains and plate tectonics go together, but erosion goes with mountains too, and you can't separate rivers and water erosion. I'll do my best to place related topics in the same post, but if you need more ideas, you can check the tags at the bottom of the post too.

We did several small activities to demonstrate water erosion and weathering. We poured a small stream of water into a pan filled with sediment, then inclined the pan and watched how the water moved. We could see the gradual wearing of a channel, as well as the spreading out of the water into as it slowed or the slope decreased. We talked about deltas and alluvial fans (here is a page with related activities), as well as meanders and oxbow lakes.

Next we observed the effects of wave erosion on coastlines. We buried several cylinders of clay (representing layers of harder rock) in a pile of sand (the softer rock). Then we filled the rest of the pan with water and gently rocked the pan back and forth to make waves:
As you can see, the waves gradually picked up the sediment on the coastline and deposited it farther out, leaving a smoothed-out coastline and exposing the rock stacks. Some of the stacks were even left standing alone in the water. We've seen lots of examples of these types of stacks when we go to the beach (Haystack Rock in Oregon, for example). Some even form arches.

We watched the carving action of water as it runs down a channel. We formed several "canyons" in the yard, and saw that the river deposits sediments downstream in deltas as well. This is an even better way to observe meanders, as a slope evens out.
And of course we made play-doh mountains of various sorts: fold mountains, fault-block mountains, volcanic mountains, etc.

You can find several other erosion and weathering activities at the bottom of this post.

Here are some illustrations of anticlines and synclines.

You can also see examples of mountains in the Plate Tectonics post.

Here's a cute landforms flipbook to make.

Monday, November 24, 2014

Interference effects and light

Any discussion of wave-particle duality has to include the famous two-slit experiment! This is one that's pretty easy to replicate at home (well, part of it, anyway) and it's cool to see the interference pattern demonstrating the wave property of light!

There are several good ways to do this demonstration: this one here is clear and easy to follow.
You can also look at diffraction patterns using these instructions here.
Light viewed through a diffraction grating

For a clear visual demonstration of how interference effects make patterns, you can use these printable moiré patterns. I love moiré patterns—my dad had a whole book of them where you moved one film on top of another to create those strange moving shapes. They can be very beautiful and elaborate. The idea is really the same as the interference you get with waves of light: two superimposed peaks create darker patches, a peak and a trough superimposed cancel each other out. A good explanation is here

To make these moiré patterns, I just printed off several pdf files from this site onto transparency film (this kind worked great for my printer). When you move and rotate the different patterns on top of each other, you get various beautiful moiré effects.

Here's a short video of how the patterns change as you move them around. So pretty!

We also talked about thin-film interference, or iridescence. This page has a good explanation of why iridescence occurs in soap bubbles, peacock feathers, etc., and this article discusses the same effect.

Wednesday, December 11, 2013

Tsunamis (and other waves)

We quite enjoyed learning about tsunamis! Because of recent tsunamis in Japan and Thailand, there is a LOT of video footage of these huge waves. And as awful and terrifying as these events were/would be to experience, it is undeniably fascinating to see the pure power such enormous waves possess! Sam previewed the videos for us to make sure there was nothing too disturbing for the children to see. (In fact, if anything, they were a little TOO enthusiastic about the videos---I tried to impress upon them that real people are affected by these disasters, but it's hard to overlook the amazingness of those waves!) I said I hoped no one would have nightmares, and Malachi said it was going to give him goodmares. Hmm.

We did an activity to compare the origins of waves---regular waves, which are caused by wind, and tsunamis, caused by earthquakes. We got the idea for the tsunami-maker from this book.

You can find more resources on waves here.

To make your tsunami model, you cut out the bottoms of two nested foil pans (you could use just one, but two is more stable). Then cover the hole with duct tape. I can't remember what happened here---maybe we ran out of duct tape? You can see we used packing tape for the bottom side and duct tape for the top, so ours wasn't totally watertight.
Fill the pan with water, and proceed to experiment! First we set our pan down and blew on it with straws, making wind waves. We got some pretty big ones.


Then, we held the pan up and hit the flexible bottom part (the tape) from underneath to create tsunamis. You can really see a difference in the size and type of wave created by a disturbance under the water (an earthquake) rather than a disturbance above the water (wind). The earthquake waves are much taller and stronger because of the sheer amount of water they displace! We were inside the house (with towels) so I didn't allow the tsunamis to get TOO enormous, but I imagine you could do even more with this activity outside on a warm day! :)

Here are some of the tsunami videos we watched:

This video is a longer one that shows some of the footage from these other links. It's an entire program so it discusses how tsunamis form, etc. 

Some description of what caused it in this one

The bigger wave comes in near the 5:00 mark

This one gets interesting around the 4:30 mark

Newscast that shows some helicopter shots


This is interesting because it shows what the waves look like before they get to land.


This one really shows the power of the water, but it does show some little kids screaming and crying about halfway through (they're safe, just scared)


Showing the aftermath

Wednesday, September 5, 2012

Water Blob and Wave Study

Our last day on water was focused on waves. We learned about how ocean waves get started, and some of their behaviors.  Because we'd enjoyed learning about water slides so much, we made sure to study artificial waves---in wave pools---too.

Here is a good explanation of wave pools (with video)
This video is awesome
We loved this site's information (you may recall we used the companion piece on water slides as well); they have great diagrams and clear explanations of what is going on

We filled up the bathtub and experimented with making different types of waves, using our hands, dropping in objects, blowing with straws, etc. (Here's a good place to start)

This video about how ocean waves develop was pretty good too.

There are some interesting ways to harness energy from waves and tides, which we read about in some of our library books (This one was probably the most informative on the subject)--but I think the information online is the most up-to-date.

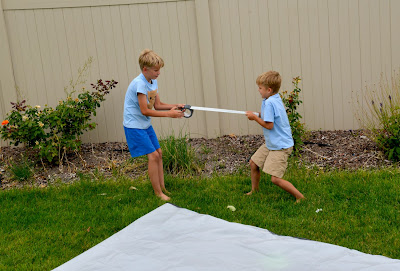
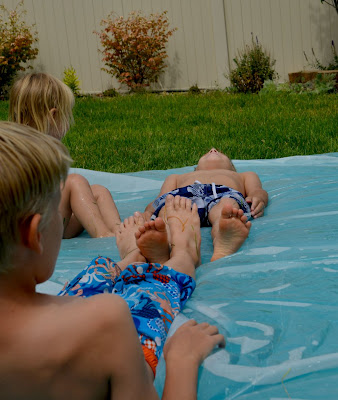
Then, on to the water blob! This was such a fun way to observe waves in motion, and to experiment with their origins and their effects! I only wish our yard was flatter so we hadn't had to be bunched down at the bottom of the hill. But hearing Daisy say "I want to go play on the Bob!" for the next few days was adorable.

Here's the tutorial for the Water Blob. It's really simple and straightforward. The only challenge is keeping the duct tape from sticking to itself or to the wrong places---but we got better at that as we went. :)
Taping the sides
Filling the blob (we added blue food coloring; a little went a surprisingly long way!)

Junie was SO EXCITED when we put her on the blob. She widened her eyes and wrinkled up her nose and giggled and giggled. She kept looking over at me and laughing, like, "Can you believe this?!" The boys bounced her up and down, and she fell over and scrambled up again, and loved every minute. So cute!

Related Posts Plugin for WordPress, Blogger...