Wednesday, November 30, 2016

Road signs and markings

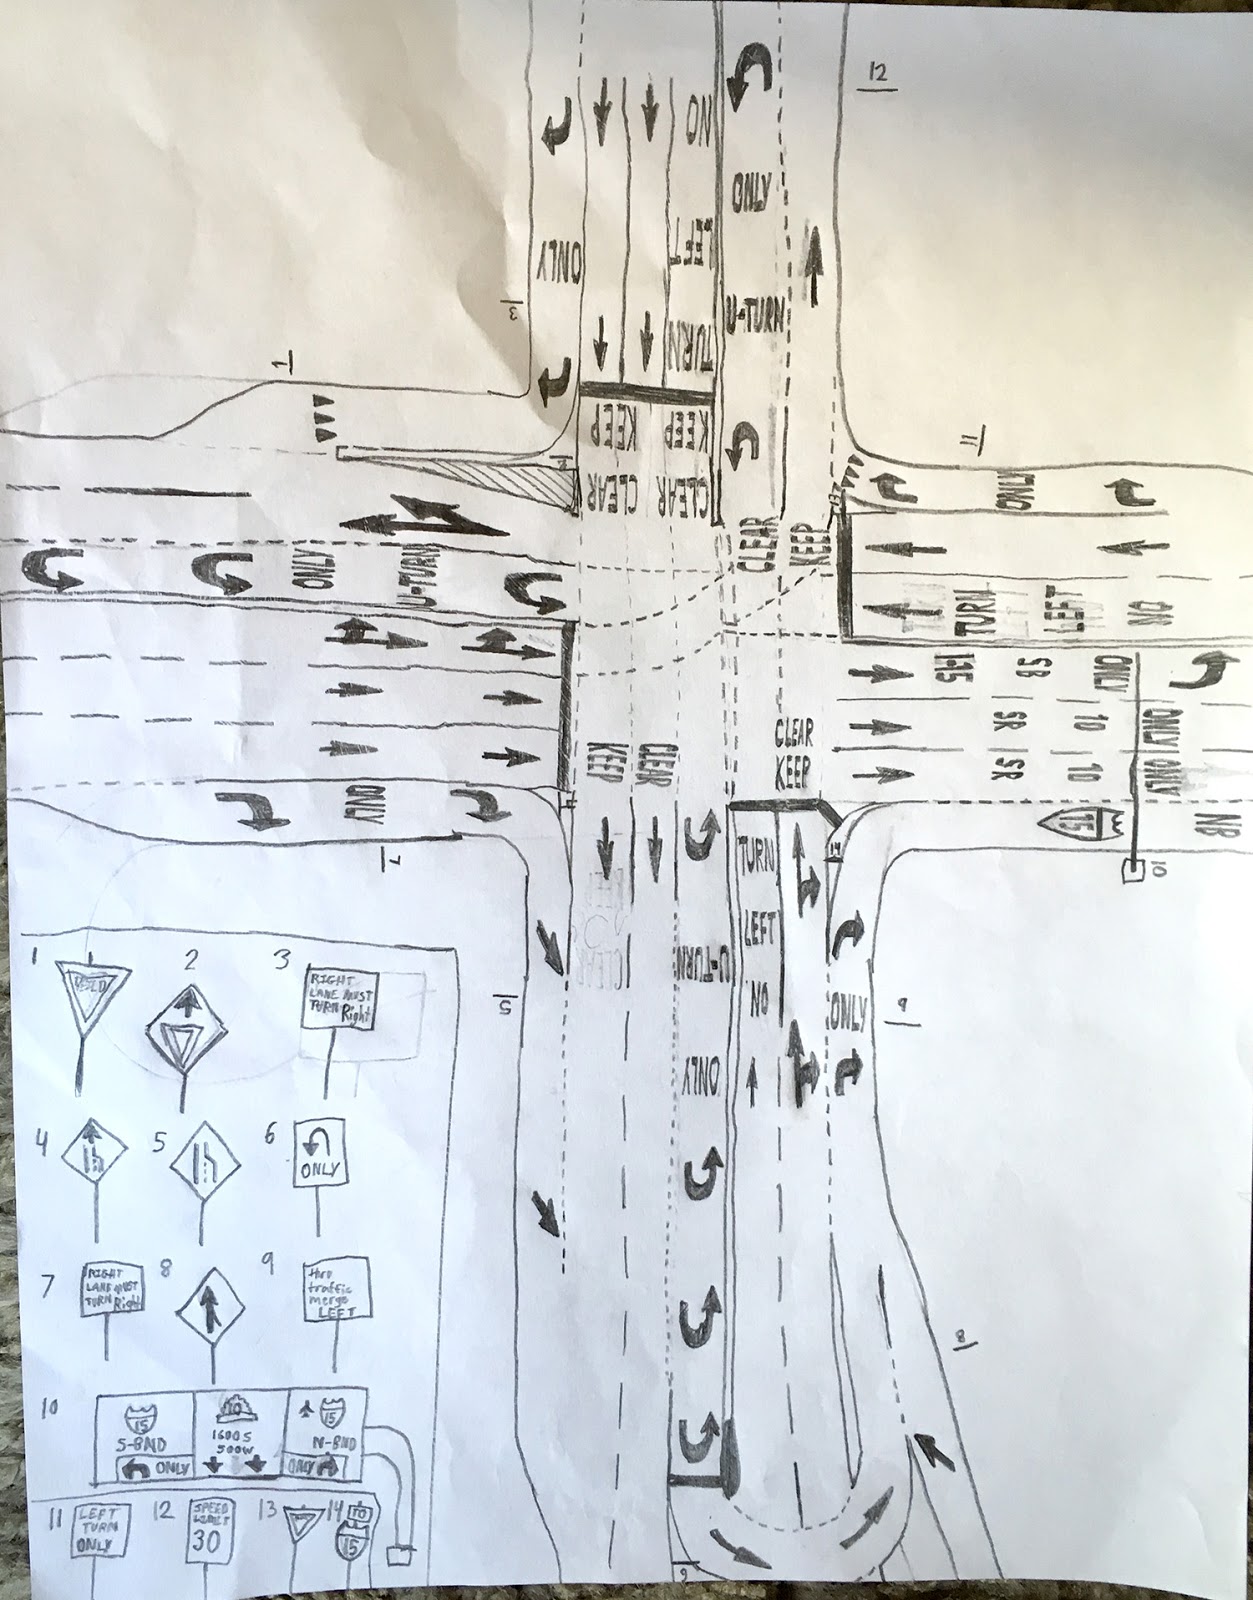
Sebastian is, oddly, really interested in intersections and road markings and so forth lately. He makes endless drawings like the one above, with stretched-out writing to mimic the elongated font they use for words like "stop ahead" on the road, and different variations on lane configurations and freeway entrances etc. There is a feeder road to the freeway where they have those variable lanes (the ones that can go one direction at certain times of day, and then the other direction at other times of day) and every time we go anywhere, he wants me to drive on that road so he can check out the interesting lanes. So, of COURSE we had to learn more about road signs and markings during our car unit!

I thought one of the coolest things we learned about was the Interstate Highway numbering system. You can tell whether an interstate runs north-south or east-west based on its number, and beltways are always three numbers with the number of the "parent" route plus an even-numbered prefix. (So, in Utah, I-215 is a belt route around I-15, and if there were another big city that needed a belt route, it would be I-415. Interesting, huh!) If the branching-off route is not a belt, but just a spur to a city, the first digit of its three-digit number will be odd rather than even. U.S. Highways or Routes have their own numbering system too. It's all fascinating—this is the sort of thing I love knowing! We learned more about this here and here.

This street sign guide is great! Tells all about the different categories of signs and what they mean.

Sebastian is still skeptical about this one. He thinks the lines are more like eight feet long. I promised him someday, late at night or when a road is deserted, we will pull over with our tape measure and see for ourselves. Until then, you just have to believe the article: Those lane divider lines are longer than you think!

You didn't realize how great it is to know the name of these things, but it is.

We learned the name of these things years ago, and still remember fondly how little Junie would call out, as a baby, when we drove onto one: "Ah-bip!" That meant "rumble strip."

Pavement marking guide. Sebastian is super into this, as seen here.

More about road lines.

Another pavement marking and sign guide. Sebastian wanted a copy of this printed out for himself. :)

Very interesting: this tells about the reflective sheeting they use on road markings.

This is fun; you can take a practice driver's license test. I was really confident that I knew everything on it, but there were a couple I missed!

Monday, November 28, 2016

Car-related field trips

Abe by a rare LaFerrari, or the Ferrari The Ferrari, as they always call it on "Top Gear."
I wanted to take the children to a junkyard so they could see the wrecking machines and how cars got stripped down for parts, but unfortunately we couldn't find a place that would let us come. Apparently everyone is too worried about liability to allow anyone under 16, blast them. It's a shame because I know lots of people who used to love visiting the junkyard with their dads when they were kids. So I was sad about this.

We did, however, visit the Ferrari dealership in Salt Lake (Ferraris are Abe's favorite car), and they were really nice. I called ahead to ask if they'd be bothered by a bunch of kids showing up, and they said not at all. So that was really fun.
This picture is so great. I have no idea why they're shaking hands; I think they thought it made them look professional or something. :)
I also took the children to a gas station and showed them how to fill the car up with gas.

And at the end of the unit, Sam took the boys to a Go-kart racing track. (The girls aren't tall enough yet to do it.) They LOVED that. It was expensive, but fun and memorable for a culminating activity.
We considered going to this Classic Car museum in Salt Lake City, but never made it there. Maybe another time. We did go to a Car Show closer to home, though, and saw many classic and vintage vehicles there, so that was fun.

Here is a calendar showing the dates and locations of Car Shows in Utah.

Monday, November 21, 2016

Car Design and Logo Design

Sam taught the children about car design and how designers often use existing chassis to make designing easier. He showed them how to take the basic body shape of a car and change it to make more interesting shapes, and how designers have to take engineering requirements into account as well. The children had fun trying to design their own cars!
On another day, Sam talked about marketing and how designers think about branding and advertising. He showed us how to use shapes and archetypes to suggest certain qualities, and how to focus our messages on just one or two main concepts that could be expressed visually. He also talked about propositional density (how many visual concepts are being conveyed in an image—the goal is to have a high propositional density for maximum effect).
Sam gave us an assignment to design a logo that conveyed the message "Fast, but friendly" (or something like that...my memory of it is uncertain). It was really fun to attempt!

Wednesday, November 9, 2016

Teaching children to change a tire

I wanted the children to learn how to change a car tire, as this felt like one of the most practical things we could teach them. I've never been totally confident about doing it myself, so it was a good review for me too! Sam showed them where to find the jack in both cars, and how to use it, and how to loosen the bolts and so forth. They thought it was cool to see how the car raised up and to peer under the chassis behind the missing tire! The boys even did some good working of the jack and the wrench, and the girls did it too with a bit of help. Those lug nuts and bolts are really on tight!

Saturday, November 5, 2016

Roadster rides

My friend's dad loves old cars and has rebuilt many different types in his garage over the years. We went over to her dad's house and saw his old Model A, and he even let us take some rides in his cute little red roadster! We loved it!

Some people enjoyed the backyard slide even more than the roadster rides. :)

Wednesday, October 19, 2016

Gears

Here are a bunch of good links about gears from when we learned about them earlier in our Simple Machines unit.

A car gear shift doesn't work so differently from bike gears! We watched some interesting videos on how various parts of the gearbox are made, in this video.

Monday, October 17, 2016

Car Engines

To talk about engines, we had some friends of ours over for dinner—Derek works in airplane design and engineering, but he has also always loved cars too, so he agreed to talk to the kids about how car engines work. It was fascinating to hear him relate it all so simply as he pointed to different parts of the car engine. It almost made me feel like I could learn to fix one, it seemed so straightforward how all the parts worked together!

Some links about engines:

Here is an animation of a traditional four-stroke engine that makes it very clear.

Here are some more resources from when we learned about Diesel engines.

And even more on engines, from when we were learning about airplanes.

Why you might use a flat-plane vs cross-plane V8 engine

Why the engine types sound "so different" (ha ha, though I personally still can't hear that much of a difference!)

And here is a video where you can hear all those different engine sounds. It's long, but if you're a 14-year-old boy who likes cars, it won't seem long to you! :)

Another engine sound comparison

Monday, October 10, 2016

Automobile Unit Study


(click to enlarge)

This Automobile Unit is one I promised Abe ages ago. I'm not sure how he got so interested in cars, since I have hardly ever given a second thought to them, but somehow he did. And lots of this unit covered things he already knew! But it was fun for the rest of us to catch up with him a little. :) For Sebastian's part, he loves road signs and markings, so we made sure to loop those into our unit as well.

We spent quite a long time covering all these things, and many of the days didn't really have something to take a picture of, but there are a few other posts under the "Automobile Unit" tag.

Some miscellaneous links:

The difference between "brake horsepower" and "wheel horsepower"

"Bloodhound SSC" is the car that's trying to break Thrust SSC's speed record

This place sounds really cool. The boys say they would love to go there someday!

Car Talk! I used to love listening to this show in the car on Saturday mornings when my mom and I were out doing errands.

Ideas from a unit study on the Model T Ford.

Model T coloring page.

And here's my Pinterest page for the Automobile Unit, with many of these same links.

We watched some carefully-selected episodes of "Top Gear" with the children, but man it was hard to find ones without swearing or crudeness! Too bad, because they loved that show. We also watched Disney's "Cars 2" and "Chitty Chitty Bang Bang" during this unit.

Speaking of "Top Gear," though, by FAR our favorite book of the unit was by Richard Hammond from "Top Gear." It's called Car Science and it was just excellent. It explained every aspect of how cars work, in an engaging way, without talking down to the reader, but in simple enough terms that I understood concepts I was totally baffled by in other books. I highly recommend it!

Friday, September 30, 2016

Insect Collection and Display

I mentioned before how much I liked making an insect collection when I was in sixth grade, and I think I enjoyed it even more this time. The children did most of the actual hunting, but it was so exciting every time we found a new insect! There were a few other insects we would have liked to find: a katydid, a stick insect, a centipede (not an insect, but we still wanted one), and a bigger moth. But we really got most of the things we hoped to get, and we love the way our collection looks now!

We labeled our specimens the best we could using our Insect and Butterfly Guides, but we may have gotten some wrong—sometimes it's so hard to tell! But it was fun trying to figure out what we'd found, anyway. We decided not to include orders and classes and scientific names, for the sake of simplicity (we liked how the collection looked better without large labels).
We ordered several things from Home Science Tools which made collecting even simpler. Here are the supplies we got:

Basic insect collecting kit. The spreading board was really useful, as were the forceps, and the pins of course. And the killing jar worked great. I hate the killing part (I always feel so sad for the poor little insects!) so it is nice to know that it's quick and painless. You can order more of the ethyl acetate if you run out (we didn't get even close, though).

Nets. We got a kid one and a standard one and they both worked well. We liked the longer handle best.

Display box. First we just had this basic box, but it started to fill up and when our specimens were looking so great, we decided we might actually want to display them. So this nicer box is perfect!
We took the glass lid off of the box for the other pictures, to get rid of the reflection on it, but I think the collection looks even nicer under the glass. We like it so much that we're going to hang it up on the wall!

Wednesday, September 28, 2016

Insect Unit Celebration

At the end of our unit, I decided we ought to use a few of the MANY cute ideas I'd seen online, and have an insect-themed celebration. It always seems like a lot of work to do these things, but since it's for school and the children like it SO much, I usually manage to muster up the motivation.

For decorations, we made these cute pleated butterflies. We worked on them together while we were watching some insect video (I think it was this one) earlier in the day, and they went really fast and took relatively little effort. You don't even really need the template, once you get the hang of it. And they looked really cute fluttering around on the windows. It would have been cute to put them on some sort of garland, but the way they were weighted made that seem tricky.

I would have also liked to make these butterfly balloons my friend Tia made for her daughter's birthday—but somehow I never got around to it!

We had a Honeybee-themed dinner to go along with one of our units a couple years ago, and we honestly could have just made all the exact same foods this time and been happy! (I think this Honey Panna Cotta was our favorite.) We decided we wanted to try some new things anyway, but you can find some more bee-specific ideas at this Pinterest board.
Here's what we ate at our celebration.
The caterpillar skewers were just fruit on a skewer. I drew in the eyes and antennae to give the general idea, ha ha. You could obviously make this better by using frosting or chocolate chips or what have you to make actual faces, but my kids mostly just wanted to eat theirs.
Here's how to make the little Babybel cheese ladybugs. We used a paring knife to trim the red wax into the right shape, and then an edible-ink pen to draw on spots. We also did some spots by punching out holes with a tiny straw, which I thought looked quite cute:
And then we stuck in toothpicks for legs. Seb also made probosces on some of his. :)

We made an Italian pasta salad using butterfly noodles, and then to go with that, we made these little mini corndogs which I liked because they were such a good model for a moth or butterfly. The hotdog is like the caterpillar; then you cover it with batter which is like the cocoon. When you deep-fry it, it hardens (again like the chysalis or the cocoon). Then to serve it, you stick some triangular chips into the side and it becomes a butterfly! :) Cute!
I ended up burning myself pretty severely while Abe and I were deep frying these, which rendered my hand useless for the rest of the evening, but luckily most everything was made by then and the kids could do the rest. I've never made corndogs from scratch (? well, not the hot dog part of course!) before, but it isn't hard. Just a quick stir-together corn batter and then the deep frying (use caution! Grabbing the wrong end of the tongs was my downfall). There's a recipe here.
These pretzel butterflies were really fun to make, although they didn't turn out nearly as smooth and nice as the ones we copied! We just melted white chocolate wafers (with a few drops of food coloring to color it), stirred, and poured into a squeeze bottle, then squeezed the melted chocolate into the spaces of the pretzels. They hardened quickly and they were really yummy. Here is another similar idea using fruit roll-ups that we considered.
We have liked Italian Sodas ever since we discovered them several years ago, so it was a simple matter to call them nectar sodas and add them to the menu. :) I wish we still had those rose and lavender syrups we made back then!
Abe took a picture of the final spread (as my hand was otherwise occupied in a bag of ice at that time) and it did look quite nice! I had ordered these edible crickets from Amazon in three flavors, so we ate those too. Everyone quite liked them, even Teddy, who kept yelling "KIKKET! More KIKKET!" with great enthusiasm. They don't really taste like anything except just the flavoring that's on them, and you get a nice little light crispness as you crunch into them. Not bad at all. And after dinner we watched "Valley of the Lost Ants" (though it could just as well have been "A Bug's Life") and we all considered it quite a satisfactory ending to this Insect Unit!
Related Posts Plugin for WordPress, Blogger...