Showing posts with label science. Show all posts

Wednesday, May 8, 2024

Chocolate Tempering Activity

Tempering chocolate is one of those things that seems hard until you learn about it, and then it seems easy, and then it seems hard again the more you learn about it. (Sourdough bread is the same way.) Keeping your chocolate in temper is fairly simple on the face of it, and yet when you're dipping chocolates, sometimes it is delicate and gets out of temper for no discernible reason, even though it seems like you should easily be able to get it perfect every time. 

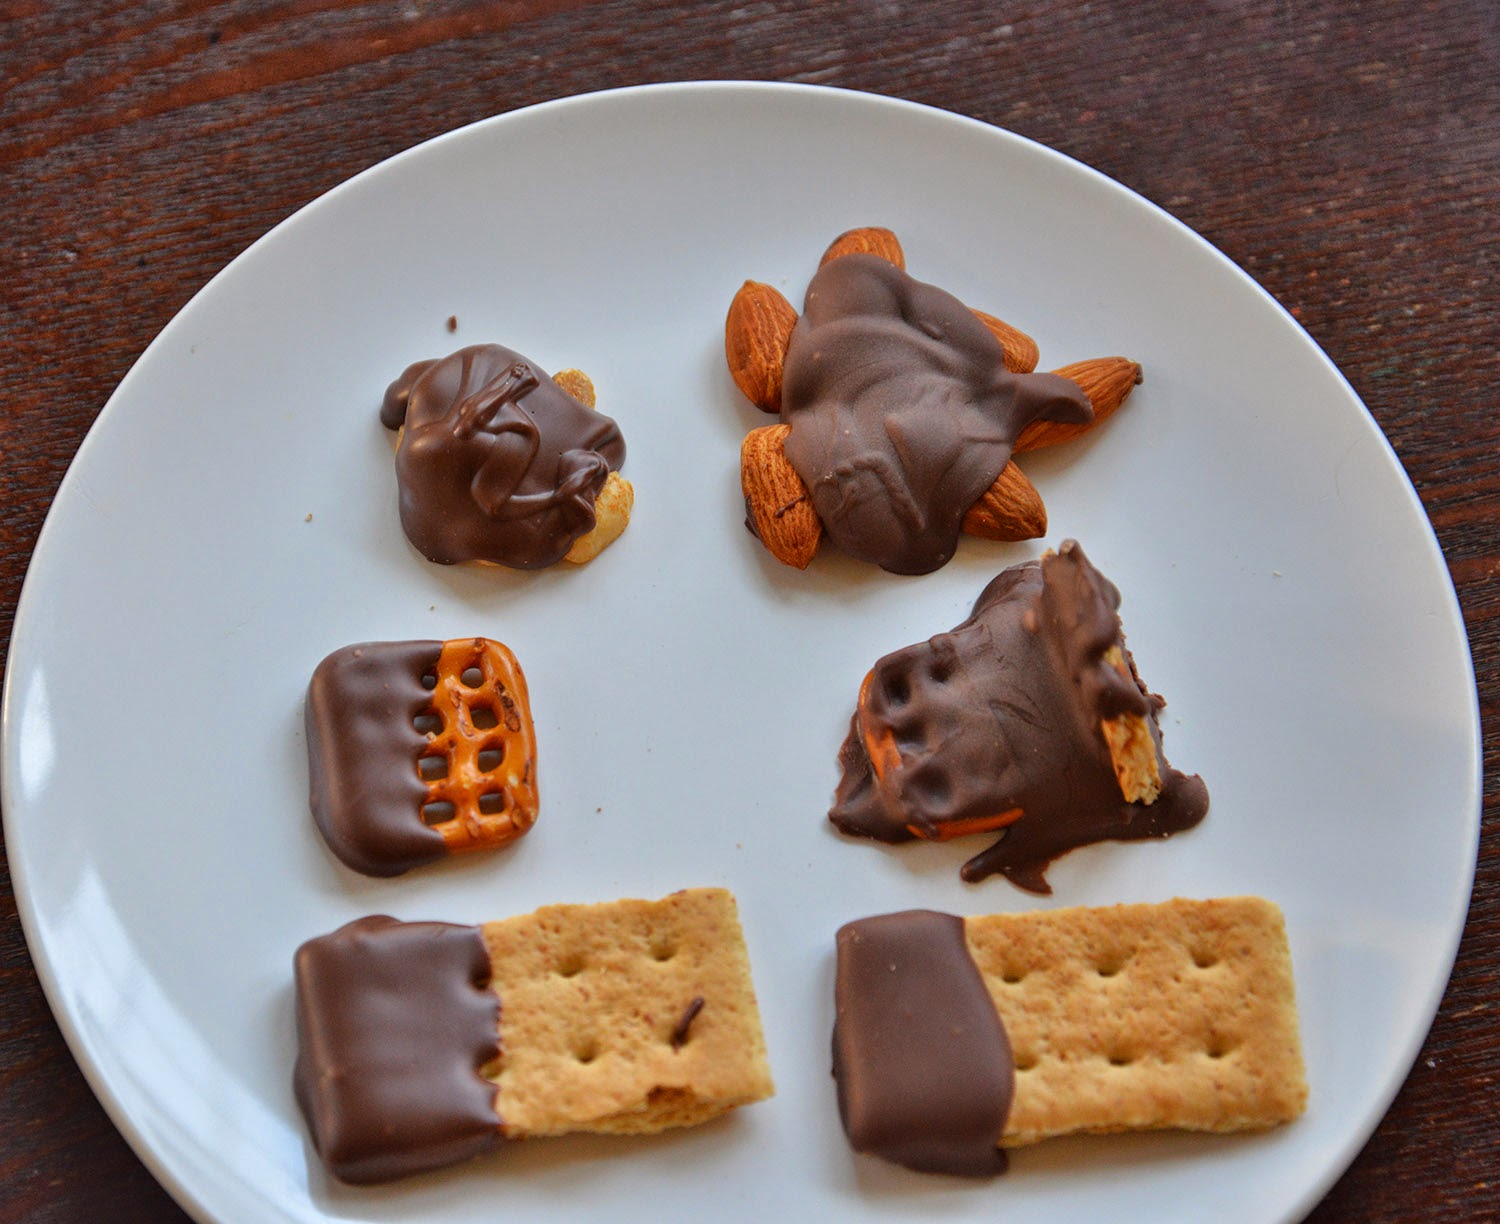
Anyway, we learned all about tempering chocolate, why it works the way it does and the underlying chemical processes. And then we tempered (and un-tempered) a bunch of chocolate and dipped things in it. Yum! Even though it all tastes good, you really do miss that textural snap when the chocolate is properly in temper (Phase V crystal formation).

And here is the link to our previous unit's chocolate tempering day!
Ooh, look how shiny these pretzels are. Perfect. 
A lovely assortment of dipped items
Out of temper, in temper
Out of temper (fat bloom)
A beautiful white chocolate dipped strawberry
Junie's bunny strawberry!
Gus's strawberry

Thursday, August 30, 2018

Elephant Unit Study and Lesson Plan

Goldie loves elephants, so we did an Elephant Unit for her first "official" unit of Kindergarten! She had just seen real elephants for the first time on our trip to the Wild Animal Park, and then we ended this unit with a field trip to the zoo, so it was an exciting couple of months for her! She was so happy.
Here are some fun elephant activities we did:


Asian vs African elephant coloring pages


This elephant puppet craft was super cute too
You can find the elephant finger puppet template here
 Another version of this craft is here. It's cute to do it with party blowers (like in this picture) because they make a trumpeting sound when you blow them out to extend the elephant's trunk!

Wednesday, May 24, 2017

Ancient Egypt activities for children

There are lots and lots of teaching resources for Ancient Egypt, so I didn't really have to come up with many activities on my own. One thing that was a big hit was ordering this Egyptian game, Senet. I think scholars admit that we don't really know for sure how it was played in ancient times, but they have come up with rules for it and my kids really liked it. They like board games anyway, but this was one even the kindergartner could play! It's just a two-player game (as you might not be able to tell from the picture) but it's quite fun! 
One book suggested making dried apples and talking about how much of food preservation involved salting or drying back in those times, especially in hot dry Egypt! You just cut apple slices and put them in a 200-degree oven until they look dry and leathery. Or you can use a fruit dryer. My children have done lots of fruit drying with their grandma, so this wasn't new to them, but it was kind of fun anyway. It relates sort of to mummification also! :)
But to really talk about mummification, we did the ol' Apple Mummies activity. I feel you can't swing a cat on the internet without smacking a page about the Apple Mummies activity, so I won't recap it much here, except to say that it's not the very yuckiest option you can do, so that's good. You use salt to approximate the natron Ancient Egyptians used for their mummies. Here's an alternate version of this project.
Another fun thing to try is making Egyptian reed boats. We just picked some hollow-ish reeds from a stream nearby and held them together with twist ties while they dried. They do, indeed, float! And the children liked floating little toy soldiers on them in the bath.
A lot of pyramid-building play went on during this unit, which was fun to watch!

Monday, March 20, 2017

Sound Wave activities and resources


Goldie feeling vibrations (from music coming out of the speakers) pass through a balloon

Some sound wave resources: 

Video about a wave machine that makes the biggest (manmade) waves in the world

Animations that show how sound is a pressure wave. When you see the waves so often simplified visually into sine waves, it's easy to forget what kind of waves they really are!

This video explains harmonics and overtones, two things I have always struggled to understand. Maybe if I were a violinist I'd have gotten it earlier!

This virtual oscilloscope is really cool

This is amazing: scientists using standing waves to levitate objects (called acoustic levitation).

And here are some beautiful patterns made with resonance

This video shows the ever-popular trick of breaking a glass with sound. You can see the waves forming in the glass in some of our pictures here,

This lady does overtone singing—or in other words, singing two notes at once! It is eerie and beautiful and amazing. I can't believe she can do this!!

Here's a video about some high amplitude sound research going on at BYU

Here are some wave activities we did as part of our Water Unit

We also investigated interference effects and other wave properties of light (part of our Light Unit)
This site will tell you how to make a string telephone. Except it never works very well, in my experience.

These pictures show an activity did where we investigated the sound-absorbing properties of different materials. (Something like this.) We stuffed various materials into containers and then listened to which were the most "muffling."

Monday, September 21, 2015

Piston, Jet, and Rocket Engines

Engines! So interesting. We learned about the basic four-stroke engine, as well as diesel engines, during our Train Unit. And early planes used this type of piston engine. See this animation for a demonstration.

(In fact, this is one of our favorite sites ever—it shows animations of different kinds of engines at work. Certain of the children could watch this site, mesmerized, for hours at a time. :))

Later, the jet engine was invented, and there are several types of jet engine: Turbofan/turbojet engines (high- and low-bypass); Turboprops; and Turboshafts. It took us a while to get them straight, but this site does a good job of explaining the differences.

Here's another site that talks about types of jet engine.

We also learned about ramjets and scramjets which are used in rocket propulsion and hypersonic flight.

Here's a "boring" (self-described) animation of a jet engine at work. :)

This site has some good information on engines.

As does this one, including parts of an engine.

Here's a simple activity to demonstrate how rocket propulsion works. We tried this with a long balloon and with a round one. The round one worked MUCH better (more volume of air, I suppose).
The balloon being propelled along the string!

A video about how jet engines work. And on the same subject, another video we really liked.

Sonic booms are so interesting! Here are two videos about them.

Wednesday, August 26, 2015

Aerodynamics and the Forces of Flight

You can't swing a cat in the Aviation Education world without hitting something about "The Four Forces of Flight." There's no shortage of resources, but I'll include a few of our favorites.

This site is just great, all around. It talks about aerodynamics, forces, propulsion, materials, and so forth, and it has lots of good little animations and videos.

This is a very good discussion of the effects besides Bernoulli's principle that act on an airplane to help it fly. When I emailed my physicist brother about the fact that we were studying aviation, he immediately wrote back, "Did you run into any controversy about whether or not Bernoulli's principle really makes them fly?  There's a perennial 'Bernoulli!'  'No, angle of attack!' discussion, as if they both can't apply." Ha! And we HAD run into it. This site does a good job of showing that multiple factors are involved.

Here's another good overview site, with some activities.

This video about the four forces of flight was thorough, and entertaining.

This is a really fun lesson plan about flight. This is where we got the idea for our "drag chute," pictured above and below. It's a very effective illustration of how strong drag can be!
We also had fun making "Magnus Flyers," which we learned about from this video. They are very interesting little gliders! You can see Sebastian demonstrating how they work here:

Thursday, August 20, 2015

Helicopters

Sometimes people in movies call helicopters "HE-LOs." Why? I don't understand. Shouldn't it be HELIs? Hmm.

After we learned about Leonard Sikorsky and the invention of helicopters (which was interesting…I had never before thought of a helicopter rotor as a moving wing. But it makes sense! Instead of going fast, so the wind will rush over your wing and create lift…you make your WING "rush under" the WIND! Brilliant.) we made a bunch of paper helicopters and tried to learn about which shapes were most effective.

We used this basic template, and then tried every possible variation. Large blades. Long bodies. Looped blades. Thin blades. Thick paper. Twisted paper. And then the children had a heyday dropping them all off of the balcony.

Here you can see them coming down in all their glory.

And here Abe demonstrates some of his design variants.

A few other resources:


Here's a cool helicopter rescue.

And here's an article and video on the group who won, after years and years, the Sikorsky Prize for a human-powered helicopter!

Thursday, May 22, 2014

Chocolate Chemistry: Tempering

Untempered (left) vs. Tempered Chocolate (right)

This was one of my favorite days because I learned so much! I had always read in recipes, things like "melt the chocolate slowly and at 50-percent power, stirring frequently!" and wondered why on earth you had to be so careful. I always warmed my chocolate at full power and it was totally fine (I thought). You do have to be a little careful not to burn chocolate (or it will seize), but that seemed like such a rare occurrence that it was hardly worth mentioning.

After learning about tempering, I finally understand! As I understand it, cocoa butter crystallizes as it cools, and at different temperatures, it forms different types of crystals. (Just like in igneous rocks!) The crystals are named alpha, beta, gamma, etc. based on the temperature at which they form. The tempering process is basically this: you heat the chocolate high enough that all the crystals dissolve. Then you cool it slowly to a certain temperature (84 F) and then slowly and carefully heat it again, not letting it get above 90 degrees for dark chocolate, or 88 degrees for milk and white chocolate. At that temperature, only one type of crystal can form, and when all the crystals are the same type and shape, they form a really tight, interlocking lattice. That makes the chocolate shiny, it makes it have a snap to it when it breaks, and it holds the fat molecules tightly within the lattice so they can't get out.

Untempered chocolate, as you can imagine, has the opposite characteristics: the varying crystal sizes mean that there is no tight lattice of crystals, so the chocolate is dull, doesn't snap, and the fats can escape and cause that white film called "fat bloom."
Sometimes fat bloom just looks like a white film, as in the picture at the top, but sometimes it actually makes these ugly dots on your chocolate, as above.

Here is an experiment you can do with fat bloom, or you can do as we did, and simply get some of your chocolate out of temper so you can compare it with the tempered stuff.

Storing your chocolate at too high a temperature, or melting and re-hardening, can also cause fat bloom.

When you're melting chocolate chips, as I so often do, there's another factor: chocolate chips actually have additives that make them resist melting. This is so they will keep their shape and look nice in cookies. (You can see the difference in the cookies above, which were made with a mix of chocolate chips and chopped melting chocolate. The chips in the left cookie are mostly intact, while the chocolate piece at the bottom of the right cookie has melted and lost its shape.) 

So, if you're trying to melt chocolate chips, you have to do it at a higher temperature (meaning they will probably get out of temper) and they will not be as smooth and runny as chocolate intended for melting. If you're going to add liquid anyway (say, to make the chocolate frosting for Sebby Cake), it doesn't matter whether you use chocolate chips or not. But for dipping or coating things in chocolate, it matters quite a lot.

When chocolate is made at the factory, it's always tempered, so when you buy it the tempering is already done, and the easiest thing to do is just keep the chocolate in temper. That means never heating it above 90 F (or 88 for milk and white chocolate), which is why all the caution and half-power recommendations that used to so puzzle me in recipes. If your chocolate gets too hot and gets out of temper, you can re-temper it, using a couple different methods. There is a ton of great information on chocolate tempering here and here. It seems intimidating at first, but it's really fairly straightforward once you have the general idea.

We melted some chocolate, some hastily and too high so it would get out of temper, and some slowly and carefully to keep it in temper. Then we dipped lots of things in it.
Tempered (left) and Untempered (Right)
Boys dipping various things in chocolate
Again, the contrast between tempered chocolate on the left (shiny and glossy) and untempered on the right (filmy and dull)

I should point out that tempering your chocolate (or keeping it in temper) is unnecessary if you're adding other ingredients to it, and even if you're planning to eat all of it right away. The fat bloom can be a bit unsightly, but the untempered chocolate tastes fine and sometimes even looks fine until the next day. But if you're trying to make chocolates that look really beautiful and fancy, and keep their lovely shiny appearance for several days, you should make sure you're using tempered chocolate. This was a revelation to us and we're really glad we learned about it!

Oh---and also of interest, speaking of chocolate chemistry, is this page on the difference between theobromine and caffeine (scroll down a bit). My neighbor when I was growing up was a chemist, and I can still remember talking to him at the ward campout one time, about how and why caffeine in chocolate was different than that in coffee. Very interesting.

Friday, May 2, 2014

Electroplating: Copper-plating Nails and Cleaning Pennies

We talked about electrolysis and electroplating, and we wanted to try zinc-plating a penny as described here, here, and here. The hard part is getting the zinc for dissolving in your solution. We tried using the zinc casing from our dissected battery, but for some reason that didn't work. We could have tried to track down some hydrochloric acid and copper sulfate to use instead, but that seemed like too much trouble when we could demonstrate the concept another way.

So, first we cleaned pennies to show how copper oxide (that greenish stuff, like rust but called "verdigris," that forms on old copper) dissolves in a vinegar and salt solution. (Instructions are here.) You can clean pennies by dipping them in the solution, like this:
A half-dipped penny---you can see the difference between cleaned and uncleaned!

If you leave the pennies soaking in this solution for awhile, they get all shiny and clean. Then, if you remove them from the solution and DON'T rinse them with water, the copper quickly begins to oxidize again and the greenish-blue verdigris starts to form. You can see it clearly on these pennies above. Interestingly, this is the same chemical reaction that forms malachite and azurite!
After you've soaked the pennies, many of the copper ions have left the outside of the pennies and have become suspended in your solution. So, once the pennies are out, you can put in some small steel nails or paper clips. After awhile, the suspended copper ions (positively charged) will attach themselves to the (now negatively charged, from sitting in the solution and giving up some of their positive ions) steel nails. If you leave them in long enough, your steel nails and paper clips will end up plated with a thin layer of copper! It looks really pretty.
(unplated paper clip on the left, for comparison)
The longer you leave them in, the brighter and more noticeable the copper plating will become! These were left in for a few days.

This isn't truly electroplating, because there was no electric current in the solution to help facilitate the process. But you can see how electroplating works based on this---the current just pushes the ions off the anode and makes the object to be plated into a cathode, so it will attract those ions. Very cool!
Related Posts Plugin for WordPress, Blogger...