Showing posts with label chocolate unit. Show all posts

Thursday, June 12, 2014

Chocolate Unit Celebration

Even though our Chocolate Unit really ended a few weeks earlier, when we got back from our trip to Oregon, the children insisted that we have a final celebration of some sort. I was curious to see what kind of interesting chocolate recipes we could find, so we picked a day and set to work making a meal where every dish included chocolate!

Here was our menu:
  • Chocolate bacon appetizers (these were interesting; the bacon had a rub of cocoa powder, brown sugar, and chili powder on it and then got baked in the oven. The sugars kind of caramelized and gave an almost barbeque-sauce-y taste? We liked it.)
  • Savory cocoa dinner rolls (they had red onion and goat cheese in them, and then we put mustard and ham on them like sandwiches. They were really good—not at all what you’d expect. The cocoa powder didn’t really give them a chocolate taste, but more of a dark taste—like pumpernickel or rye or something. They would be really good with a dinner of cooked ham, I bet. But they weren’t as good for leftovers.)
  • Chocolate Molé Soup. (Inspired by Chili Ancho Sopa de Chocolate, but I changed the recipe so much I didn't feel I could in conscience call it the same dish.) This was quite good. Almost like tortilla soup, and we served it with avocado and sour cream and tortilla strips on top. Yum. My recipe is below.
  • Hot chocolate
  • Tiiiny little bowls of chocolate mousse
  • And our chocolate Sebby cake

The boys decorated with a banner (it's very detailed and you can't see all the elements, but it involves a Cacao Tree Titan growing in the Temperate Rainforest, and someone looking at it in astonishment, and a greenhouse with watering and humidity controls, and Ritter-sport chocolate bars, and banana slugs, and so forth. The usual.) They also placed various chocolate ingredients in little artistic vignettes around the house.

After dinner we watched "Willa Wonka and the Chocolate Factory" (the old one, of course).
Savory Cocoa Dinner Rolls
Tiny Chocolate Mousse
Molé Soup

And here's how I made that soup:

Chocolate Molé Soup

1 onion
1 red sweet pepper
2 T. olive oil
4 roma tomatoes
1 can diced tomatoes
1 can green chiles
2 tsp. ground cinnamon
1 tsp. sugar
1 tsp. cumin
5 pinches ? chili powder—you can make it spicier, of course
6 cups chicken stock (or water and bouillon cubes)
1 1/4 c. semisweet chocolate, chopped (or chocolate chips)
Salt and pepper to taste
Optional, for garnish: Sour cream, sliced avocado, cilantro, lime, cotija cheese, fried tortilla strips or crumbled tortilla chips

Directions:
Cut the onion and pepper up and cook them in a pot in the olive oil until they are getting black.

Add the 4 Roma tomatoes, cut up in pieces, and 1 can diced tomatoes.

Sauté just a bit more, then add the chicken broth and scrape the bottom of the pot to loosen all the blackened bits (adds such great flavor, yum!). Then add the green chiles, cinnamon, sugar, cumin, and chile powder. Let it simmer for awhile (20 min?)

Blend it with the immersion blender, or in batches in the regular blender, until it’s smooth. Return to pot and turn heat on low.

Add chocolate and stir till melted; add salt and pepper and more chile powder to taste.

Serve with sliced avocados, cilantro, lime, cotija cheese, sour cream, and tortilla strips.

Wednesday, June 11, 2014

Chocolate-Covered Caramels

Emboldened by our truffle success, we decided to make chocolate-covered caramels for Sam for Father's Day. At the crucial moment (as the caramel was already bubbling away merrily) I couldn't find my candy thermometer (!) so I had to make the caramels just by eyeing the color and using the "firm ball stage" ice-water method (!!) and they turned out perfectly anyway (!!!). I was very impressed with myself. I love caramels but I must say, chocolate-covered caramels are even better.

Here is my good, faithful, tried-and-true caramel recipe. It never fails me (although I have sometimes failed it).

Caramels

2 c. light karo syrup
2 c. sugar
½ t. salt

Stir well with wooden spoon and place on medium heat. Bring to a full rolling boil and add alternately but do not stop the boiling:

½ pt. (1 c.) whipping cream (unwhipped)
1 cube butter (cut in 5ths and dropped in separately)
½ c. + 1/3 c. evaporated milk

Add the above three things a little at a time. Put in a thermometer and cook to 233 degrees---this may take about half an hour. The caramel should be darkening but not too dark. You can put a small ball of caramel into ice water and then taste it to see if the chewiness is right. When caramels are done, remove pan from heat and add 1 t. vanilla. Pour into buttered 9x13 pan. Cool several hours or overnight, until caramel is set. 

For caramels, cut into squares and wrap individually in waxed paper.

For chocolate-covered caramels, dip squares into melted chocolate (make sure chocolate stays in temper while melting; that is, keep it under 88 degrees for milk chocolate or 90 degrees for dark chocolate) and place on parchment paper. Sprinkle with a few grains of sea salt, if desired.
The older boys helped do the dipping. They are getting really good at it!
We put a couple layers of these, sprinkled with a little sea salt, between waxed paper in a box for Sam and covered them with a sheet of tissue paper. They were every bit as good as any you'd buy at a fine chocolatier---if we do say so ourselves. :)

Tuesday, June 10, 2014

Truffles

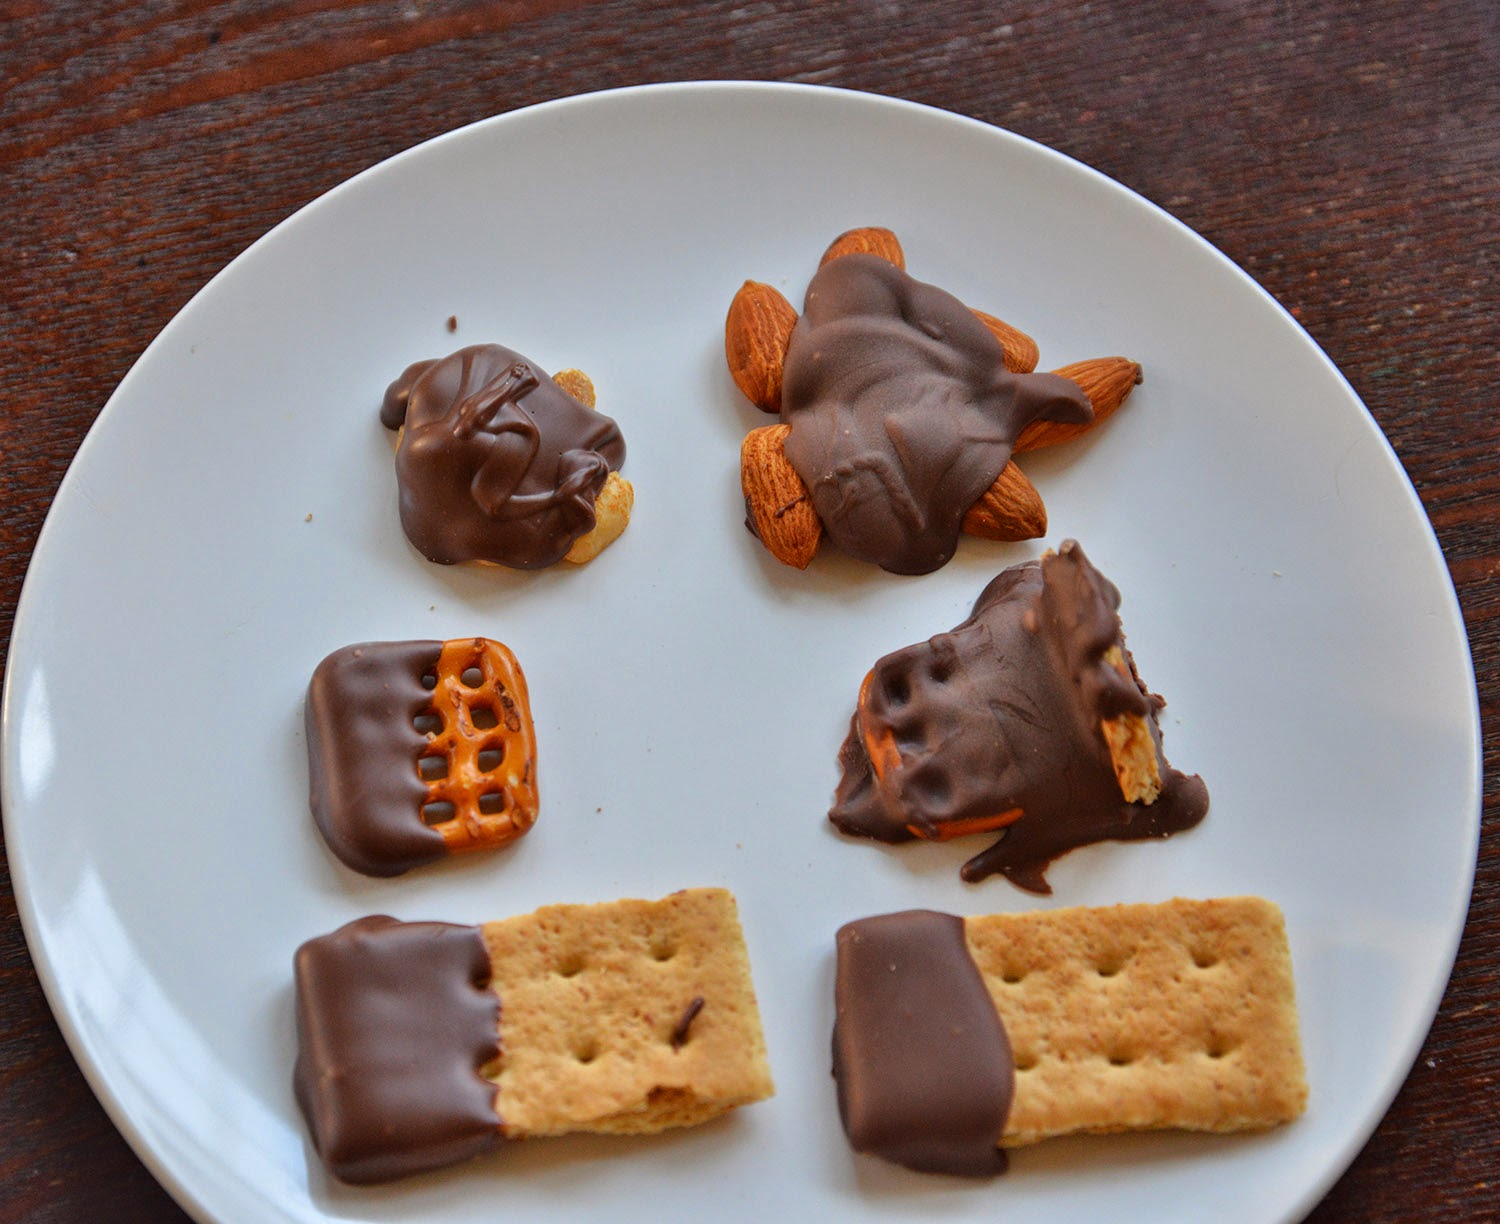
Since we've learned about tempering, we've been wanting to make various things and dip them in chocolate! We tried making these truffles a little while ago. The centers were made with milk chocolate, and we dipped them in semisweet chocolate. We were quite proud of how pretty they looked!

We followed the recipe for the centers here, and it was really good, but I think I like my old recipe a little bit better! The one we made this time was just slightly too sweet, or something. It's been a couple years since I've made the old ones, though, so I'll have to make them again soon to make sure I remember. :) Here is my usual recipe for truffle centers:

Truffles

1 c. heavy cream
2 T. butter
2 tsp. light corn syrup
1 pound finely chopped semisweet chocolate, plus 12 oz for dipping

Bring cream, butter, and corn syrup to a boil over medium heat. Turn off heat. Add 1 pound chocolate; gently swirl pan to cover chocolate with cream, but do not stir. Let stand 5 minutes.

Slowly whisk until combined. Refrigerate, stirring every 16 minutes.

After 45 minutes, mixture will thicken quickly, so stir every 3-5 min until thick enough to scoop, 10-20 min more. Form into one-inch balls and place on parchment-lined cookie sheet.

Chill centers until firm, but not hard (about 15 min). 

Dip into melted, tempered milk chocolate, and if desired, roll in cocoa powder to finish.

This is a (very bad) picture of a time when we made the old kind of truffles (from 2008!)---you can see that I didn't know what I was doing with the dipping at all, and the chocolate wasn't tempered---though that cocoa powder covers a multitude of sins! :)---but the taste was very good.
Back in the present day . . . the boys roll truffle centers
We dip with great seriousness
Truffles drying!

Thursday, May 22, 2014

Chocolate Tasting Activity

Of course, we had to have a Chocolate Tasting Activity---it was our duty! I bought a bunch of different types of chocolate at the grocery store, and we made up a lab sheet to fill in with our observations.

The types of chocolate we tasted were:
  • Ritter Sport, Alpine Milk
  • Theo Chocolate, 45% Cacao, Milk
  • Scharffen-Berger, Creamy Milk
  • Amano, 30% Cacao, Milk
  • Millcreek Chocolate, 70% Cacao
  • Rainforest Chocolate, 72% Cacao, Mint
  • Hershey's, Milk
  • Ecuadorian Crunch, Coconut
  • Lindt, 85% Cacao
  • Lindt, Dark with "Touch of Sea Salt"
  • Milka, Milk

I see, looking at this picture, that the only chocolate without an identifying wrapper is the Ritter Sport, and since that is mine and Sam's favorite, I feel obligated to point it out in case you want to look for it at the store. It is the one by the black arrow. It comes in a square bar and the wrapper looks like this. (The light blue wrapper kind is my favorite; the dark blue wrapper kind is Sam's favorite. Oh, and the milk chocolate with praline is pretty amazing too.) I tried it first in England, I think, but lately I've seen it stores here too. Yay!
We tested several of the snootier chocolates (the kind that brag about their fair-trade origins and their "cacao" [never cocoa!] content). They were good, but Ritter Sport remained the clear winner for me. A couple of the children liked the Milka better. My second-place choice was the Theo Milk Chocolate, and Sam liked the Scharffen-Berger Milk Chocolate second best. None of the "75% cacao" or other dark chocolates really had a chance, as we like milk chocolate so much better, but we did really like the dark Lindt with a "touch of sea salt." I did like tasting the darker artisan-style chocolates, but I wouldn't buy them again, as they were SO much more expensive---some close to $6 and $7 a bar! Whoa.

We also thought that Hershey's chocolate has an unfair stigma. Sure, it is much different than the creamier European-style chocolate (and there is a difference in the law: in Europe, anything labeled "chocolate" has to be at least 35% cocoa solids and 18% cocoa butter, and in the US it only has to be 10% cocoa solids!)--I've never really been a Hershey's fan--- but it's not a BAD taste and someone who prefers it isn't inferior as so many chocolate snobs would have you believe. :)
It was really fun to taste so many types of chocolate and compare them---I think I can safely say this was an activity everyone enjoyed! :)

Chocolate Chemistry: Tempering

Untempered (left) vs. Tempered Chocolate (right)

This was one of my favorite days because I learned so much! I had always read in recipes, things like "melt the chocolate slowly and at 50-percent power, stirring frequently!" and wondered why on earth you had to be so careful. I always warmed my chocolate at full power and it was totally fine (I thought). You do have to be a little careful not to burn chocolate (or it will seize), but that seemed like such a rare occurrence that it was hardly worth mentioning.

After learning about tempering, I finally understand! As I understand it, cocoa butter crystallizes as it cools, and at different temperatures, it forms different types of crystals. (Just like in igneous rocks!) The crystals are named alpha, beta, gamma, etc. based on the temperature at which they form. The tempering process is basically this: you heat the chocolate high enough that all the crystals dissolve. Then you cool it slowly to a certain temperature (84 F) and then slowly and carefully heat it again, not letting it get above 90 degrees for dark chocolate, or 88 degrees for milk and white chocolate. At that temperature, only one type of crystal can form, and when all the crystals are the same type and shape, they form a really tight, interlocking lattice. That makes the chocolate shiny, it makes it have a snap to it when it breaks, and it holds the fat molecules tightly within the lattice so they can't get out.

Untempered chocolate, as you can imagine, has the opposite characteristics: the varying crystal sizes mean that there is no tight lattice of crystals, so the chocolate is dull, doesn't snap, and the fats can escape and cause that white film called "fat bloom."
Sometimes fat bloom just looks like a white film, as in the picture at the top, but sometimes it actually makes these ugly dots on your chocolate, as above.

Here is an experiment you can do with fat bloom, or you can do as we did, and simply get some of your chocolate out of temper so you can compare it with the tempered stuff.

Storing your chocolate at too high a temperature, or melting and re-hardening, can also cause fat bloom.

When you're melting chocolate chips, as I so often do, there's another factor: chocolate chips actually have additives that make them resist melting. This is so they will keep their shape and look nice in cookies. (You can see the difference in the cookies above, which were made with a mix of chocolate chips and chopped melting chocolate. The chips in the left cookie are mostly intact, while the chocolate piece at the bottom of the right cookie has melted and lost its shape.) 

So, if you're trying to melt chocolate chips, you have to do it at a higher temperature (meaning they will probably get out of temper) and they will not be as smooth and runny as chocolate intended for melting. If you're going to add liquid anyway (say, to make the chocolate frosting for Sebby Cake), it doesn't matter whether you use chocolate chips or not. But for dipping or coating things in chocolate, it matters quite a lot.

When chocolate is made at the factory, it's always tempered, so when you buy it the tempering is already done, and the easiest thing to do is just keep the chocolate in temper. That means never heating it above 90 F (or 88 for milk and white chocolate), which is why all the caution and half-power recommendations that used to so puzzle me in recipes. If your chocolate gets too hot and gets out of temper, you can re-temper it, using a couple different methods. There is a ton of great information on chocolate tempering here and here. It seems intimidating at first, but it's really fairly straightforward once you have the general idea.

We melted some chocolate, some hastily and too high so it would get out of temper, and some slowly and carefully to keep it in temper. Then we dipped lots of things in it.
Tempered (left) and Untempered (Right)
Boys dipping various things in chocolate
Again, the contrast between tempered chocolate on the left (shiny and glossy) and untempered on the right (filmy and dull)

I should point out that tempering your chocolate (or keeping it in temper) is unnecessary if you're adding other ingredients to it, and even if you're planning to eat all of it right away. The fat bloom can be a bit unsightly, but the untempered chocolate tastes fine and sometimes even looks fine until the next day. But if you're trying to make chocolates that look really beautiful and fancy, and keep their lovely shiny appearance for several days, you should make sure you're using tempered chocolate. This was a revelation to us and we're really glad we learned about it!

Oh---and also of interest, speaking of chocolate chemistry, is this page on the difference between theobromine and caffeine (scroll down a bit). My neighbor when I was growing up was a chemist, and I can still remember talking to him at the ward campout one time, about how and why caffeine in chocolate was different than that in coffee. Very interesting.

Wednesday, May 21, 2014

The Berlin Airlift and The "Chocolate Pilot"

I really liked the idea of tying the story of the "Candy Bomber" (or the "Chocolate Pilot," as he was also called) into this Chocolate Unit. Montserrat has a cute mini unit study here. This subject is close to my heart as I have a special connection with the Candy Bomber, aka Brother Halvorsen---he was in my church congregation when I was young and he is my best friend's grandpa! I actually lived in his house for a semester of college, while he was away. And most exciting of all, I got to go to Germany with him, his wife, and my friend Rachael, right after we graduated from high school. It was a totally amazing trip that still seems unreal when I remember it. 
Bro. Halvorsen was visiting Germany for a bunch of celebrations based around the 50th Anniversary of the Berlin Airlift, and Rachael and I got to tag along at all the black-tie events, and the ceremonies with visiting dignitaries and 4-Star Generals. We got to visit an elementary school named after him (Gail Halvorsen Elementary) and even see a musical written about his life (which, awesomely, had little-girl Rachael as a character in it!). I have probably never felt so important in my life as I did on this trip (and I wasn't even related by blood---though he is my adopted grandpa too) :)
Menu, commemorative coin, and nametag from one of the dinners. "Miss Marilyn!" I love it.
I love Brother Halvorsen and even though I've heard his story probably dozens of times over the years, I never stop being amazed and moved by it. He always says, "From little things come big things!" I love his humility and his kindness and his wonderful sense of humor, and I love him for how he treated me like his own granddaughter and was so good to me over the years. And he looks exactly the same now as he did when I was young! He never ages!
Last year, my mom took Abe to the Mormon Tabernacle Choir Christmas Concert, and to her surprise, they had a whole segment featuring Brother Halvorsen! They showed a video about his story, and at the end, parachutes holding chocolate bars actually dropped from the sky! It's an amazing moment, even when you watch it on the video.
And . . . even more amazing . . . Abe caught one of the parachutes! He has saved it and treasured it since then (he won't even eat the candy!), and I love it, because now he feels like he has a special connection with Bro. Halvorsen too!

It was so fun to talk with the children about Bro. Halvorsen's story, and to remember and show them pictures from my trip to Germany with him. Abe got this book for Christmas, so we read that and watched the accompanying DVD (so awesome). We also read a couple other books about the Berlin Airlift and "Operation Little Vittles."

Tuesday, May 20, 2014

Chocolate Water Mousse

This two-ingredient chocolate mousse relies on process and amounts to keep the chocolate from seizing and add air to make it light. (He explains it very well in the video here.) It's made with only chocolate and water! Amazing. It has a very pure, intense chocolate flavor due to the lack of any cream or other flavoring. Here is just the portion of the video that shows how to make the mousse, but it is very vague about amounts. After whisking our mixture forever, it still wasn't thickening, so I did a little more reading about it, and finally found that if the chocolate mixture remains runny after several minutes of whisking, you probably need more fat content (so return the pan to the heat and add more chocolate). Because we were using milk instead of dark chocolate, our chocolate-to-water ratio had to be a little higher, I think. Here is a good recipe and further explanation.

After we added more chocolate, it worked perfectly! We also switched over to the hand beaters, as Abe's arm was getting too tired, but you have to just be careful not to overbeat the mousse---as soon as it is thickened, stop beating!
This was really good eaten plain, but VERY intense---none of us could even finish a small bowlful, which is very unlike us! :) (At one sitting, I mean. Naturally we finished our bowls later!) But it would be just lovely served in little tiny bowls, with a dollop of cream and maybe a mint leaf on top. It would be so elegant! And I also kept thinking how good it would be instead of buttercream frosting in between layers of chocolate cake. Yum!
UPDATE: We tried serving this in tiny bowls the next time we made it, and it was perfect. So cute!

Monday, May 19, 2014

Chocolate from Bean to Bar

Finally, we get to the actual process of how chocolate is made---from bean to bar, as everyone seems to say. This was fascinating and there are lots of videos and other resources for learning about it.

We liked this page; very simple and clear (with charts!)

This kit (pictured above) is something my mom had given to her years ago---it's from the Hershey's company and it has a little vial of material from each step of the chocolate-making process. It's really cool to see (and taste/smell/feel) these samples. I read somewhere that you could write to the Hershey Company to get this little kit sent to you, but I couldn't find anything about it on their website, so maybe they don't do it anymore. Still, it might be worth calling or emailing the company about, if you're interested.

This is a really fun interactive animation. They had this same thing at the Chocolate Exhibit we went to at the museum, and the children loved playing with it, so they were quite happy when we got home and found we could do it on our own computer as well. I'm having trouble with that link taking me straight to the page, so you can also try going here and clicking on "manufacturing chocolate," on the left side under "Interactives." You can cut the cacao pods off the trees, spread them to dry, put them into the roasting machine, etc. Very fun.

Here's a slideshow about the chocolate-making process (nice pictures)

We learned the difference between milk, dark (including bittersweet, semisweet, and sweet), and white chocolate. White chocolate contains cocoa butter, but no cocoa solids/cocoa liquor.

This brief history of the company is pretty good (you might have to click on "English" at the bottom to change the language), but I absolutely loved these vintage advertisements from Ritter-Sport. Knackish" (or something like that) is probably the best word for "crunchy" I've ever heard, and I only wish I spoke German so I could quote their other slogans in it. "Square. Convenient. Good." "Ritter-Sport: What Else?" So great. (Ritter-sport is my very favorite chocolate, by the way, even after trying many, many others.)

Chocolate Factory Field Trips

We went on a couple simple, but fun field trips. One was to Mrs. Cavanaugh's Chocolates up in North Salt Lake. We've actually done this tour before and it's a pretty fun one, though you don't actually get to go onto the factory floor. You look through the windows and learn about what's going on, and you watch a video about how chocolate is made, and you get several samples throughout the tour. Fun!

Our other field trip was to Utah Truffles, in Sandy (they have recently moved, so don't go to the Salt Lake address. The address at the link above is correct.) Their website just says "come in any time for a factory tour!" so we had no idea what to expect or if they'd welcome children. But they did. Again, it's not really a tour---just looking through a window at the conveyor belts and the chocolate centers going through the chocolate waterfall, etc. Kind of like the donuts you see being made at Krispy Kreme! But the lady who helped us was really nice; she answered all our questions and---most wonderful of all!---gave us several huge handfuls of truffles, some in every flavor, to take home! The children were astounded at this generosity and talked about it all the way home: "She gave us SO many! Can you believe it?! And we didn't even have to pay!" We tasted them all after lunch that day, and they were all wonderful. We love truffles, and these seem particularly good (especially for the price point)! Utah Truffles was still settling into their new factory, and it looked like it would be even better when they have their Grand Opening in a few months---they will have a little retail store, an atrium, etc., which were still under construction when we visited.

We wanted to visit Amano Chocolates, but when I called, they told me they weren't currently doing tours. The guy said they were hoping to have tours up and running in "a few months," so we'll check back again later this summer, because it would be fun to see how a true chocolate-maker (as opposed to a chocolatier---the former actually makes chocolate from cocoa beans; the latter makes chocolate confections with chocolate that has already been made somewhere else). At least I think Amano is a chocolate-maker. 

Theo Chocolate in Seattle is a bean-to-bar factory, and next time we're in those parts we want to take their tour. We tasted some Theo chocolate in Oregon and it's really good.

There's also the famous Hershey Chocolate Factory in Pennsylvania, which I visited when I was a teenager and was greatly disappointed by (I'd been, perhaps unfairly, expecting a magical world like Willy Wonka's factory:)). We watched their factory tour videos on the day we learned about Milton Hershey, who is a fascinating and inspiring man. We also watched this video about the school for orphans he founded, which is still around today. Definitely worth watching.
Here are some videos about how chocolatiers make chocolate candies:

Moonstruck Chocolate, in Portland, Oregon (which we visited a few weeks later, pictured above)

See Chocolate Bunnies, etc. being made

How assorted chocolates are made

Of COURSE we read Charlie and the Chocolate Factory aloud together during this unit, and we loved it. One day I had the children design chocolate-making machines to go in Mr. Wonka's chocolate factory. They had fun with that assignment. Their designs are below:
Abe's machine
Malachi's involved putting banana-shaped chocolate inside a banana peel, so you would have a big surprise when you peeled the banana! :)
Seb's machine

Sunday, May 18, 2014

Chocolate Chemistry: Emulsifiers

Since cacao beans have fats in them called "cocoa butter," when you try to mix them with a liquid, the fats and the waters want to separate. To get them to combine smoothly, you need an emulsifier such as lecithin. Lecithin is a natural substance found in egg yolks, and it's the same thing that emulsifies mayonnaise. We spent a day learning about emulsions; here are some resources:

Emulsion experiment---pictured above. You mix oil and vinegar in one bowl (on the right), oil and vinegar with an egg yolk in the other (on the left). You can see how the egg yolk acts as an emulsifier to get the fats to stay suspended in the vinegar instead of separating out into their own little blobs.

This is a very good video that talks more about emulsifiers and chocolate.


You can also see the oil-water separation at work when chocolate "blooms," which we talked about when we studied the process of Tempering Chocolate.

When you are melting solid chocolate and adding liquid (like in a ganache), you have to stir in the liquid carefully and add enough of it to maintain the emulsion. If you are just melting chocolate to use for dipping, you have to be very careful not to even get a drop of water in the melted chocolate, or the chocolate will seize, like this:
Seizing means the emulsion has been broken and the chocolate becomes grainy and clumpy. It can't be rescued for dipping, although you can still use it by adding a large amount of liquid to it (like adding milk and making a cup of hot chocolate). (More about seizing here.) Seizing can also happen if the chocolate is heated to too high a temperature and "burns."

In spite of the well-known rule that chocolate and water don't mix, we made a very interesting chocolate-water mousse on another day! The guy talks about it in the video I linked above.
To see another emulsion in action, we used these instructions to make homemade mayonnaise. We used our immersion blender and it worked beautifully! It was really fun, too---the moment the liquids suddenly morph into this creamy mixture, it's like magic! It tasted yummy, but if I were making it again, I'd adjust the ingredients just a little. That's the beauty of making it at home, I guess.
Related Posts Plugin for WordPress, Blogger...