Abe and I both memorized the Gettysburg Address during this unit. The two younger boys know large chunks of it, but they can't get through the whole thing without help.
I think I had memorized the Gettysburg Address, at least partially, sometime in the distant past, and of course it's all really familiar to me, but it was surprisingly hard to move from there to actually having it truly memorized. It's that last section---with all its "rather for us" and "for us the living, rather" and "to be dedicated here" and "to be here dedicated"---that really gets me. Abe and I were in gales of laughter as he tried to help me get it. And I finally did, and so did he. I think he does such a great job reciting this; he really gives the sense of the words as well as the words themselves. Which is good, because I feel like my Abraham ought to have a special bond with the words of Abraham Lincoln.
Here he is, wearing his Abe Lincoln beard and Daisy's magician hat from last year---which doesn't quite fit his head---but it adds a nice touch. :)
As we entered the last week of our Civil War Unit, I assigned the three boys a final project on whatever Civil War subject they chose. I gave them a few guidelines (it had to be made with materials we had on hand; it had to be something they could do mostly by themselves; it had to include several written facts about the topic; etc.) and turned them loose. Abraham and Sebastian did literally their entire projects by themselves---there was much secrecy and intrigue so no one could see anyone else's project while it was being made. I helped Malachi with his, but only with the actual construction of it---the set-up and the materials were his own ideas. I was really, really impressed by how well they all did. At our Civil War Unit Celebration (we kept accidentally calling it our Civil War Celebration, which doesn't seem very good) they each gave an oral presentation where they talked about their projects and answered questions, and they did a great job. I loved seeing what they came up with!
Hard at work
Abraham's project was a display of Civil War artillery (guns and projectiles). He taught us that there are two kinds of artillery, guns (cannons) and howitzers (of which mortars are a type). He made models of all those, with their various parts labelled.
He also had a section for shells and balls---solid shot, canister shot, shells, etc. He painstakingly created these little canisters filled with poppyseeds to represent the gunpowder or grapeshot inside. It was awesome.
Cannon
Howitzer
Malachi's project was a model of the "ironclads"---the Monitor and the Virginia (or the Merrimack as many books called it).
The Merrimack was made of a big vinegar container cut in half and covered with duct tape. I helped cut the holes for the cannons (it is historically accurate with 14 gunports, four on the broadsides and three each on the bow and stern) and cut strips of duct tape for him to use. The smokestack is a toilet paper roll and the flag is taped onto a straw.
The Monitor was just a flat strip of cardboard with a gun turret (hairspray lid+toilet paper roll+strange cone-shaped duct tape structure) and the captain's box (foreground) was part of a matchbox. The smokestacks were straws as well. Malachi was disappointed that we couldn't figure out a way to make the gun turret turn around like it really did on the ship, but I thought it looked great just how it was.
Sebastian chose to make a depiction of the Battle of Fredericksburg. It's such an interesting (and sad) battle because of all the mistakes that were made----starting with the pontoon wagons arriving 10 days late, so the engineers had to build the pontoon bridges under heavy fire from the waiting Confederates on the other side of the river. Some Union soldiers actually had to paddle across the river in pontoons to provide some cover for the engineers while they finished up the bridges, so the rest of the army could cross.
Seb explained the movements of the battle in great detail---I think stuff like this really fascinates him. The macaroni noodles on his poster represent artillery for both sides.
He wrote it as "Fredericks-'burg'", he told me, because it's spelled differently than St. PetersBERG and he prefers the -berg spelling. :)
I could go on and on about how much I like these projects, but I'll confine myself to a simple, "Good work, boys!" :)
Here's what our bulletin board held during the Civil War Unit. I highly recommend this map---we referred to it, put pins in it, looked up casualties on it, and lots of other things. It was a great visual reference. The sheer number of battles in the Civil War is just amazing; you learn about the big ones and you know that isn't all of them, but I don't think I ever realized just how many there were. We also had a timeline which we added to during the unit. It was really simple: just dates of things we thought were important, along with pictures to help us remember which battle was which.
We made drums for the children to march around the house with, and to drum on while we sang or listened to music of the Civil War. I had a great songbook from the library that told about the songs as well as provided nice piano accompaniments. We loved singing "Battle Hymn of the Republic," "Battle Cry of Freedom," "Dixie," "Slavery Chain Done Broke at Last," and others.
On a side note, during our morning devotionals this unit, we sang through all the battle and war-related songs we could find in the hymnbook, and the children loved it SO MUCH. They would BEG to sing "just one more," and often we'd sing all 4 verses of four or five different songs in one morning. I don't blame them, as the martial hymns are some of my favorites too. There are lots of hymns with battle/armor of God imagery, but the ones we liked best were: [hymn numbers from the LDS Hymnbook]
#60 Battle Hymn of the Republic (of course)
#243 Let us All Press On
#246 Onward Christian Soldiers (when the children learned that this was written by Sir Arthur Sullivan, of Gilbert and Sullivan, they were thrilled. They love The Pirates of Penzance.)
#248 Up, Awake, Ye Defenders of Zion
#249 Called to Serve
#250 We are all Enlisted
#251 Behold, A Royal Army
#259 Hope of Israel
They were so delighted with all the talk of foes and regiments and captains. It was really cute.
Back to drums! We were "lucky enough" to have recently popped one of those big rubber balls that comes from cages at the grocery store, and I saved the rubber (plastic?) for this purpose. If we hadn't had the popped ball, I was planning to use some leftover vinyl from the carwash we made a few summers ago.
We used oatmeal containers, pineapple cans, and a potato flakes can for our drums, but of course you can use any container you want. We just opened one end of the container, stretched the rubber across, and taped it to keep it tight. Then we taped butcher paper around the body of the drums so we could decorate them.
This worked fine and I've made lots of this kind of drum in the past---however, we also found a method that I like even more: a packing tape drum. The great thing about this drum is that it actually has a pretty nice sound, and you can get a decent double-bounce even without using real drumsticks! I was a drummer in high school/college, so I'm pleased about things like that. :) I loved playing the drums and I miss it!
I do have real mallets and sticks, but I never let the children use them, so we made our own out of craft foam and chopsticks. They are pretty good, for homemade mallets. The craft foam makes them a bit bouncy, and they're lighter than real sticks so they're good for little hands.
Here's how you make the mallets:
Cut a longish, thinnish triangle of craft foam. Tape the chopstick to the wide end of it, like this.
Roll the stick up in the foam toward the point of the triangle
Secure it with tape (or glue would be even better so you wouldn't have tape over your foam, but we never have the patience for glue to dry).
So, there are our Civil War drums. We had lots of fun with them. You can hear how they sound in these videos:
Me playing the tape drum with a really weird grip (the chopsticks were too short for me); you can hear its nice clear sound compared to the rubber ones
Here is a fun toy to make when learning about children in "the old days"---pioneers, Civil War, etc. The boys did this in their 4-H Club with my mom. We have always called this kind of toy the Yama Man---I think that's a name my Nana made up for these little yarn men. We even have a song to go with it:
The Yama yama, the Yama Man,
He will catch you if he can.
So run for your Mama,
'Cause here comes the Yama,
The Yama Man.
As you can see he is easy to make. Just take a long piece of yarn and loop it back and forth until it's a long bundle (cut the ends so there are no loops). Tie the bundle at the top.
Then do the same thing to make a slightly shorter bundle. Tie it at top and bottom, then insert the short bundle through the long one to make the arms. Tie the long bundle above and below the arms (neck and waist).
Next, separate the bottom of the long/vertical bundle into two legs, and tie each at the ankle.
You can stitch a little face on him if you want.
Or you can make a Yama Mama instead---just don't tie off the legs; it will be a skirt instead.
We also did weaving on top of cardboard squares and made little mats.
This was another of our "daily-life-in-Civil-War-times" activities. Dipping candles is really fun. We weren't very well prepared for it because I didn't have a nice long, thin-but-not-too-thin glass contained to dip from. We tried a quart jar first, but I didn't have enough wax to fill it all the way, and then we used this old vase, which was too narrow and made the wax cool too quickly. I actually had bought a tall, thin drinking glass at the thrift store for this very purpose, but although it was on my receipt, it somehow never made it home with me. I must have left it at the checkout register. Grrr, I hate it when that happens! (It was only 50 cents and I didn't realize I didn't have it till a few days later, so it didn't seem worth going back for.)
We did have a lot of fun anyway, though, and the boys were SO proud of their beeswax candles. They looked great and burned very nicely too. We burned them at our end-of-unit celebration dinner.
Here are two good overviews of how to dip candles with children: This one uses crayons for color
and this one leaves them off-white, like ours.
A few miscellaneous pictures of Sebastian playing soldier during this unit. Malachi played with him a lot too, but for some reason I only have pictures of Seb. It was cute to see how much they liked marching around and shouting orders at each other, since they've never really played army or soldier games before this. I loved the "bayonet" Seb constructed out of a letter opener, which he stuck inside an old curtain rod.
I almost always have the boys wear their "school clothes" when we're having school (blue or white polos with blue or tan pants/shorts) and I think Malachi and Sebby wore navy blue shirts with navy blue pants every day of the unit because they said that was their "Union Soldier Uniform."
These Civil War soldier toys got a ton of use, both formally and informally, during this unit.
They are fairly sturdy and we loved how detailed they were. I got mine at Hobby Lobby.
We learned that most of the Confederate soldiers didn't really have standard-issue uniforms. Most of them wore handmade clothing, and much of that cloth had been dyed what they called "butternut" color. Women in the South made dye out of crushed walnut or other nut shells, which dyed the cloth a sort of tan-brown color. When that brown got dirty and dusty, it looked grey---thus "the blue and the grey" division between North and South that we've all heard of. (And I think their official uniforms, when they had them, may have been grey as well.)
So, we tried our hands at making butternut dye! I don't know how well it turned out. Should it have been darker? The picture on our instruction post looked darker, but this picture looked about like ours. We were kind of busy the day that we did it, so we may have rushed the process a bit, and maybe our shirt would have turned out darker/better if we'd left it in the dye bath for longer. We still have a bag of walnuts in their shells, so we may try again another time. However, it was still a fun and memorable activity, and the children were very pleased with their handiwork.
Anyway, here is the process we used. It's very simple, basically just crushing the shells, boiling them, letting them steep, and then adding vinegar. Maybe we should have crushed the shells smaller, so they were more powdery? We didn't have a nutcracker, so we banged our nuts with a hammer to crack them, then pulled out the nutmeat and banged the shells with the hammer some more. It was quite fun.
Butternut-dyed shirt
Seb playing soldier (bedroll, pack, musket with bayonet, ammunition pouch, and canteen). I like his stern face.
During the Civil War, quill pens were still a common writing instrument. Metal nibs were used sometimes too, but quills were cheap and convenient, and ink was often made out of berries. So we decided to try our hands and making and writing with quill pens.
First we made our ink. I had a few strawberries that had gone bad which I saved just for this purpose (I suppose I would have used good berries if we'd had to, but it would have been sad to waste them). We just followed the recipe here: crush some berries and strain the juice into a bowl, then add a bit of vinegar (to set the dye) and salt (so it won't spoil if you keep it around for awhile).
Nice and squishy
Berry ink!
There are a lot of ways to cut quills, some more complicated than others. You can heat up some sand and stick your feather in it to harden the end, which apparently achieves good results, but we didn't bother with that step. Therefore, when we tried to cut our quills like this, they just sort of chipped off or got crushed. But the simple method, of just cutting the shaft of the feather off at an angle, worked just fine for our purposes.
Before we used our pens, we talked about how important handwriting was in those days, and how people would sometimes hire scribes to write their letters for them. We talked about how the mail system changed during the war, and the prevalance of letters for disseminating information. We also looked at lots of handwriting samples. I just love the fancy script the best calligraphers used!
Here is some lovely fancy penmanship (the flourishes are my favorite)
Here is one alphabet (I tried to copy this font style with my quill)
Even Junie and Daisy really loved sitting down with a quill, dipping it in a little "inkwell," and drawing with it. Here are some things we wrote and drew with our quill pens and berry ink:
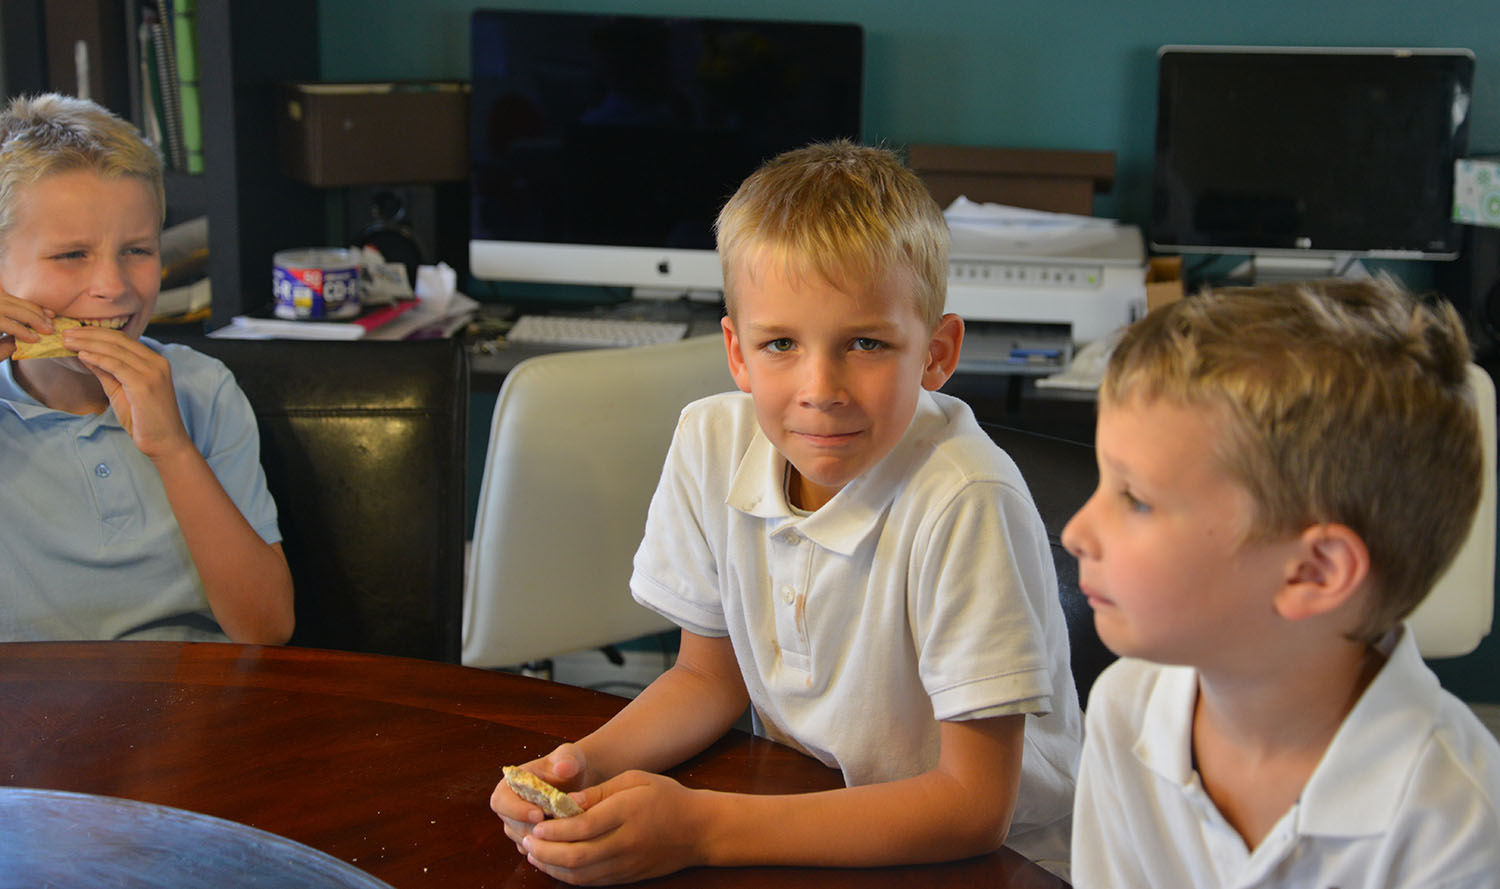
We found lots of information about "A Day in the Life of a Civil War Soldier," and one thing that came up again and again was how miserable the typical soldier's diet was. We decided to try making hardtack, which was one of their staple foods. To be really authentic we would have used weevil-infested flour, but we decided not to. :)
Hardtack is basically just a mixture of flour and water, baked until it's hard and crunchy. We mixed 3/4 cup of water with 2 cups of flour. We also added a teaspoon of salt (only the lucky soldiers would have had that). Then we pressed the dough into a pan and poked it all over with a fork.
After baking it at 400 degrees for 30 minutes, we turned it over and baked it for about 20 more minutes. Then we let it cool.
Because we ate it fresh, our hardtack actually wasn't too bad. Hard and crunchy (see Abe trying to gnaw off a piece of it) but palatable. Sebby said he quite liked it. Abe said he'd rather have a banana split. :) I reminded the children that it would just get harder and harder the days after it was made.
Another activity we did was making bandages out of blankets and shirts. We talked about how often, there were no medical supplies nearby (or the medical supplies would run out with so many wounded), so soldiers would have to improvise bandages, tourniquets, etc., with whatever they had around. It's still a useful skill even today---once I fell and cut my knee open (to the bone---ew!) while running on the mountain, and my friend used her shirt to make a bandage while she ran ahead for help.
Here are a couple of our attempts (Sebby's looks like a turban)
Finally, here are the three boys pretending to be prisoners of war in Andersonville prison camp. We read that it was so crowded that the soldiers had to sleep three to a bed, and if they wanted to turn over, one would call out, "All turn to the right!" or "All turn to the left!" so they could turn without falling off the bed. The boys thought that was really hilarious and immediately re-enacted it. :)


