Monday, June 8, 2015

Japanese Garden at the International Peace Gardens

Under the red torii gate
We've visited Japanese Gardens in Denver, Portland, and San Francisco, but I was hoping we could find some kind of Japanese garden around here to visit during our unit. I came across some Yelp reviews for the International Peace Gardens, which included a Japanese garden, so I looked up their website and found it here. Based on the reviews, I wasn't expecting anything too great. People said the gardens were pretty, but kind of neglected. Still, I thought they would be worth a visit.

When we got there we were pleasantly surprised! Yes, there are a few aspects of the gardens that haven't been kept up: some of the ponds are empty, and not all the beds are as well-tended as they might have been when this place was new. But it was so lovely, in spite of that! The Japanese garden was one of our favorite sections, but there are gardens from countries all over the world. The children loved running around and exploring them all! It's a great place to come on a nice Spring day. We would love to go back again, maybe with a picnic this time. We were so glad we found out about this place!
Japanese flag above the Japanese garden
It has all the elements of a traditional Japanese garden. Graceful arched bridges (painted the lucky color red)—
Stone lanterns (this one would have been on a little island in the pond, if there had been water in the pond). Daisy found this little branch and was holding it up all day and calling it her little "bonsai," in case you're wondering what she's got there.
Nicely-shaped trees. And this looked like it might once have been a little waterfall. It would be so fun to see this place with all the water features!
Another stone lantern
Abe and Goldie on the bridge
Another small red bridge, by a clump of pretty Japanese iris
And Junie found this lovely Juniper tree.

Each garden section in this park is fairly small, but the whole park covers quite a big area. Then there is an even bigger park, with playground equipment and skateboarding ramps, etc., surrounding the International Peace Gardens. It was so nice to walk around and see everything. I'll show pictures from the rest of the garden, even though they aren't really related to this Japan Unit, just because everything was so beautiful.
Switzerland's garden. Don't you love the Materhorn there?
There was a cute miniature Swiss chalet below the mountain.
This was Mexico, I think. The girls thought this big head was hilarious, for some reason.
The Chinese Garden had a couple nice pagodas, and some cool stone lion statues.
There was water in this pool!
The French garden
Greece's garden
I love this covered arbor walkway! I assume it was for Denmark, because at the end of the walkway was…
The Little Mermaid, just like the one in Copenhagen Harbor!
Daisy and Junie liked her. We wished she had some water to sit in!
The children were playing all sorts of games up by this Stonehenge-y sort of rock installation. I think they were pretending to be trains?
The International Peace Garden is a beautiful place to visit. We recommend it!

Saturday, June 6, 2015

Japanese calligraphy

Once our handmade paper was dry and ready to use, we got out ink and brushes and tried to write on it. I don't know if that can be called true "calligraphy." We don't know at all what we're doing, obviously, but some of our books showed us the proper order of strokes to write kanji characters, and we looked others up online. There are sites like this that will show you a character with an animation to show the stroke order.

Mostly, though, we just wanted to get a feel for the technique of using a brush to write with, and see if we could get characters to look good on our handmade paper.

Japanese is a really hard language to learn, we read, because of the three alphabets and the huge number of kanji in use, but we all learned to count to 10, and we liked this site that explained how some kanji characters came to be. We also watched this Begin Japanology episode about one of the alphabets, hiragana. Really interesting. (I thought this article about gendered speech was interesting too.)
I thought writing the numbers was quite fun. They are much simpler than some of the other characters! :) And I love the thick-thin strokes you get when you're using a brush.

Friday, June 5, 2015

Handmade Japanese Washi Paper

Since "washi" means paper in Japanese, I guess it's kind of redundant to say "washi paper," but I thought it might be more useful for search engines that way. :)

We had a great time making paper. Really, it's not true "washi" because it's not made from the same materials, but the process is similar, even though we had the benefit of a blender and paper scraps to use for our pulp! We gained a new appreciation for this ancient Japanese craft. If you'd like to see the process done authentically, this video shows washi being made (without much explanation), and this longer video shows the whole process, with commentary. We liked the second video best.

When I was young, I remember trying to make papyrus out of iris leaves for a school project on Ancient Egypt. I think my mom and I managed to make something that kind of worked, but I wish we'd had the internet to help us, because there are so many tutorials on paper-making! I thought this was the best tutorial for our purposes, because it didn't require us to buy anything (many tutorials have you build a basic screen frame, which seems fairly simple, but not as simple as just…using what you already have) and the pictures were really clear.

In case you want more direction than that on how to make paper, I will walk you through the process as it worked for us.
1. First, decide what you want to use for your pulp. Mostly, you can just use scrap paper, although we read that glossy pages (like from magazines) and newspaper don't work as well. Envelopes are good. We also put in iris leaves, because real washi uses plant material (softened bark and roots), so we wanted to use some plant material too, and iris leaves seemed like they'd be nice and fibrous. (They really probably should have been soaked to soften them first, but they blended up fine, so maybe it doesn't matter.) They made our paper kind of greenish. 

Just tear up whatever materials you are using into smallish pieces and put them in the blender. *NOTE: make sure your scrap paper doesn't have tape on it! We accidentally left some pieces of tape on our paper, and it did NOT blend up well. We kept having to pick little hard bits of tape out of our pulp.
2. Cover the paper pieces with water, so they are mostly saturated. Then pulse it in the blender until it makes a thick pulp. Make sure everything is really well-blended, so you just have a thick, soupy pulp with no big chunks of paper in it. You will need about 4-5 blenders full of paper to make into pulp.
3. Pour the pulp into a large container which has been filled partially with water. We put about 2 inches of water into this plastic bin, and then poured the pulp into it. We used about five blenders full of pulp in total. You want the mixture to be thick, but not too thick. About like a blended potato soup. You can experiment with the pulp-to-water ratio: more water-to-pulp will give you a thinner, more delicate paper. In the video we watched, the washi was SO thin, it was almost translucent. It was beautiful. If we do this project again, I'd like to experiment with trying to make thinner paper, but the thicker paper is really nice too, and I think it might be harder to mess up. :)
4. Stir the pulp so that it mixes thoroughly with the water and the mixture is consistent all the way through. 
5. Now, you need a screen. Any screen will do! In traditional washi making, they use a sort of mat (it looks like the same type of mat you use for rolling sushi, kind of bamboo-y, with slats). That's nice because it's flexible and you can kind of bend it off the paper when it's time to separate the paper from the mat. But here, people seem to usually use screens. This is the part that seemed needlessly complicated in lots of the tutorials we found. Some said you should construct a sort of two-sided folding frame, called a mold and deckle, out of a screen and some wood. This does give your paper a nice straight edge (and makes squeezing easier), but if you are just doing this for fun and don't want to bother with it, you really don't need it. 

The tutorial we used dispenses with the mold and deckle, and has you use two screens (one for holding the paper, one for pressing) instead. But we thought you don't even really need TWO screens. Just one. A round splatter guard screen like this one will work fine. It will make your paper come out round, but you can always trim it into a square later if you want. We also tried using this rock-sorting screen we had (the rectangular one pictured above) but because it had a frame around it, it actually seemed a little harder to use.

Immerse the screen fully in the pulp and then lift it up evenly, wiggling it slightly as you lift. You are trying to get an even coat of the pulp onto the screen. You'll get the hang of it after a couple tries.
6. Lift the pulp-covered screen out of the pulp mixture, and lay it on a bed of towels. While it's still fairly wet, you can press in flower petals. Make sure you press them all the way into the pulp. We never perfected this process—lots of our petals weren't attached firmly enough to the paper and fell off once it was dry. You could certainly just stir your flower petals or leaves right into the big bin of pulp in the first place, and that would work well, but if you do it that way you can't lay them out in the pattern and amount you want. Anyway, as long as you press them all the way in and kind of through the pulp, they seem to stay in place pretty well.
7. Now you need to press the water out of the paper. In the tutorial I linked earlier, she says this is where you can use the second of the round screens. You lay it over the top of the pulpy screen and then press down to squeeze water out of the pulp. We did this the first few times, but then we found that just laying a towel right over the pulp worked fine too. It does leave a little bit of the towel texture imprinted, so maybe that's what the screen can help you avoid, if you don't like that. We didn't mind it. She also suggested using a dry sponge to blot over the paper and then squeeze out, back into the bin of pulp. After all was said and done, we thought the very best way to get out lots of water was to just lay the pulpy screen on a doubled up towel, lay another doubled-up towel over the top, and press down over and over. You can use your hands or even step on it with your feet. Just get as much water out of the paper as possible.
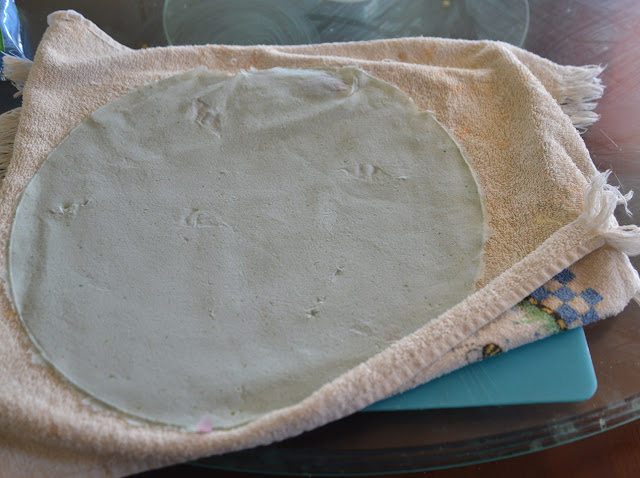
8. Next, you just turn the screen over and kind of whap it so the pulp (now we'll call it paper) falls off in one piece onto a new towel. (We found that putting this towel on top of something stiff, like a cookie sheet or cutting board, made it easier to move later on.) It seems hard at first to get the paper to come off the screen, but if you have gotten it dry enough, it comes quite easily. If the paper is really sticking to the screen, try blotting it more with the towel. Then turn the screen paper-side down, give it a nice sharp rap, and the sheet should fall right off. It is very fragile at this point, so be careful when touching it. If you have to smooth out a wrinkle or something, be really gentle.

9. Take the paper out in the sun to dry (or let it sit in any warm place overnight). Ours dried in a few hours on a very hot day, but we waited until the next day to write on it, just in case.
10. You're done! We liked our homemade paper so much! Junie made the paper in her picture all by herself, and even though it had a few wrinkles and ragged edges, she was so proud of herself! As she should be. It's great paper. We were amazed at how strong, yet flexible, it was.
Our handmade paper was really fun to write on, too. It was quite absorbent and soaked up the ink quickly, and we loved the little plant fibers and flower petals peeking through the paper.

We loved making our own paper! Such a fun project.

Thursday, June 4, 2015

Japanese stationery

The Japanese do love their stationery, which is reason enough to want to visit there someday, in my eyes. I have loved the Japanese site Jetpens for a long time, and I'm always browsing through looking for some new cool pen or paper. Our favorite pencil sharpener is from Jetpens, and Sam gets a lot of his art pens there as well.

We watched this Begin Japanology episode about stationery, and one of the interesting things we learned was that the ink from erasable Frixion pens turns clear when it's heated. That should have been obvious, maybe, since that's the whole point of the friction eraser (it heats the ink so it will turn clear and disappear) but we were still excited enough about it to test it for ourselves.

Abe wrote with one of our Frixion markers on this paper:
And when we held the paper under a hair dryer, sure enough, the ink began to disappear! Soon the whole paper looked white again. So cool!

We also watched this episode on Japanese scissors, which made me really want to try some U-shaped spring scissors sometime.

Bonsai Art

Sam teaches an Art Lesson to the children (and me) when he can on Fridays, so during this unit he taught a class using Bonsai as a vehicle for some fundamental art principles. He showed this video on fractals and then discussed areas of rest and areas of detail, line flow within a composition, etc. He had us draw bonsai using big shapes and try to make them interesting and dynamic with the shapes they chose. After they had their shapes drawn, he had them fill in the shapes using ink and paintbrushes. It was quite fun to do, because the ink was so satisfyingly wet and bold and black! :)
Our bonsai pictures.

For awesome pictures of bonsai (and instructions on how to grow and cultivate them, but that is way too big of a project for us right now!), we recommend this DK Publishing book: Bonsai. We loved looking through it. We just love bonsai in general! 

We liked this video about bonsai, and especially the teeny tiny MINI bonsai they show, no bigger than your thumb. The cutest! Daisy almost died of happiness.

We went to a store that sells bonsai (Cactus and Tropicals) so we could see some in person. We like them so much. If they didn't seem like so much work to keep alive and beautiful, I would definitely want some in our house!

Animals of Japan; Geology/Geography of Japan

We watched several "travel video"-type movies about Japan during this unit, and our favorite was probably this one from "The Little Travelers." It's made from the viewpoint of two little girls traveling (alone, they make it seem like) around Japan. Daisy and Junie especially liked it. There are funny parts where the little girls try new foods or play with other children, and it just gives a feel of "this is real life in Japan." It was cute.

We talked a lot about Japan's geology, since it is so exciting! Hot springs, volcanoes, earthquakes, tsunami…all things the children are interested in. We had watched some videos of the 2011 earthquake and tsunami during our Natural Disasters Unit (you can find links here) so we looked up those and watched some of them again. The power of those huge waves is truly amazing.

We also thought the pictures of the earthquake's aftermath, here, were very interesting.

Here is an episode of Begin Japanology about Japan's volcanoes.

The children, naturally, also loved learning about the Shinkansen or bullet train. They've loved all kinds of high-speed trains ever since learning about them during our Train Unit, but we talked more about the TGV than we did the Shinkansen at that time, so it was fun to learn more about this specifically Japanese innovation. We learned that the Shinkansen was developed by a man who made kamikaze fighter planes (with no landing gear, but with streamlined fronts suited for dive-bombing ships) during World War II. He used the streamlined nose designs from the planes to inspire the distinctive front end of the Shinkansen. This was a good video about the Shinkansen, and this video about how the workers clean the trains in only seven minutes was interesting too.

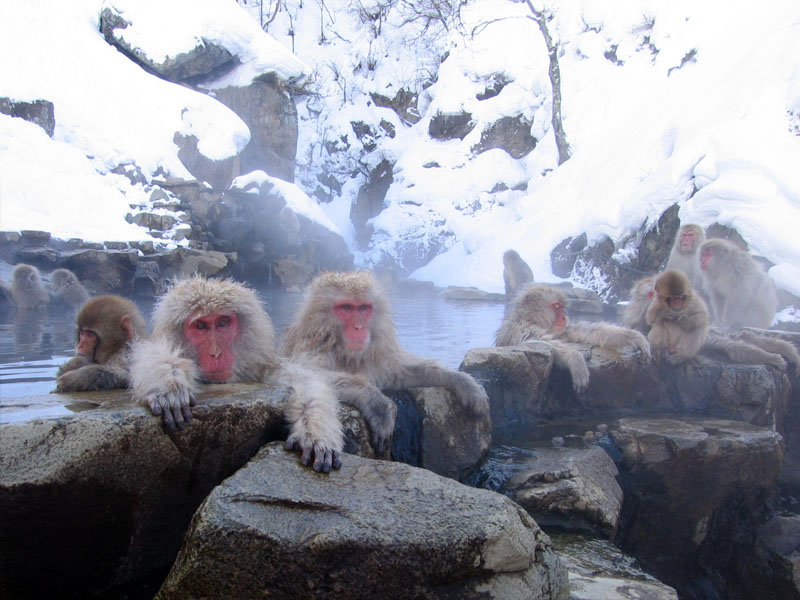
Japan has many interesting animals, but we were most interested in a couple specific ones: the Japanese Macaques or snow monkeys (the ones that like to sit in the geothermal pools—we're always seeing pictures of them) and the bunnies of Bunny Island.

We quite enjoyed this movie about the Snow Monkeys. It's your typical kind of nerdily-dramatized nature documentary (narrated by Liam Neeson). Be aware that does show some monkeys mating. And a baby monkey dies. :( But the monkeys are so cute! We loved them.

Speaking of monkeys, my friend Carrie Ann told us about her visit to this monkey park near Kyoto. It was in one of the travel videos we watched too. It looks so fun! We would love to go there.

Bunny Island is a tiny island in Japan where there is a huge colony of semi-tame rabbits. They think some rabbits were maybe left there by schoolchildren a long time ago, and then multiplied? Here is some of the story behind it. It looks like a place I would love to visit. So many bunnies! There are lots more pictures and videos:  Here, here, here,  here and even more here.

Wednesday, June 3, 2015

Japanese food: gyoza, tempura; "Kawaii cooking;" teppanyaki-style food

One night we decided to try making gyoza, which are the Japanese version of potstickers. We LOVE to eat potstickers, so we were pretty sure we'd like making them too.

I adapted this pork gyoza recipe, but now that I've made them once, I think it would be pretty easy to make up our own filling using cabbage and other vegetables, or adding some other type of meat. Apparently even the restaurants in Japan don't usually make their own wrappers, so we bought some of the round pre-made wrappers at the store and that made it easy. It always takes a while to fill so many little dumplings, but it's fun to do, and we got the hang of the pleating pretty well after a while. They turned out really quite delicious.
Our very favorite thing about studying Japanese food (besides eating it) was when we learned about the sampuru, or plastic food samples, often used in Japanese restaurants. These food samples are so realistic and delicious-looking that Japan is famous for them! I've even seen them at a ramen restaurant we went to in California one time. There is a cool introduction to the food samples here, and also a fascinating video here. You have GOT to watch the man form cabbage by dropping sheets of warm wax into water, and then folding it together and slicing it. It is AMAZING!

Anyway, one of the most popular food samples to make is tempura shrimp. So we decided to try making that, too. I have never shelled and de-veined shrimp before, but I asked the man at the meat counter to show me how, and he did, so now I can do it! The children helped me. We made tempura shrimp and also tempura vegetables, and everything was delicious. We used this recipe here for the batter and some miso mayonnaise dip (very yummy).
On another day, we talked about the Japanese concept of "kawaii," which basically means "cute," but has other implications as well (see a discussion of "kawaii" here). We watched some episodes of THE CUTEST YouTube show, called "Kawaii Cooking," which shows you how to make all sorts of impossibly tiny and edible things. They are adorable. Our favorite was probably this one showing tiny donuts.

While we were making gyoza, Sebastian decided he wanted to make a "kawaii gyoza." So he did:
Eeek! The tiniest!

Our own Japanese food was delicious, but I must admit it is not as good as food prepared by real Japanese chefs who know what they are doing! We got to go to a Japanese tepanyaki-style restaurant (called Bonsai Japanese Steakhouse; we recommend it; it's awesome) and we were amazed at how good everything was! 

Incidentally, lots of people (including the owners of this restaurant, so it must be acceptable) call this type of restaurant a "hibachi" steakhouse, but we learned that this isn't quite correct: a hibachi is a small grill with a grate, usually not even used for cooking in traditional Japanese homes, but just for heat. Teppanyaki is the correct name for the big griddle that they use at these places. Maybe since there's also an actual restaurant called Tepanyaki, it's just too confusing to call it that?

Anyway, Sam and I have been to a Tepanyaki and also to a Benihana (same kind of place) and we think this restaurant, Bonsai, is the best of all of them. We loved it. And of course the children loved the onion volcano and all the other antics of the chef. It was a really fun place to go (for a special occasion—it is not as expensive as Benihana, but still not cheap).

Tuesday, June 2, 2015

Japanese Tea Party

We do like a good tea party in this family. I wasn't going to do one for our Japan Unit, but after talking about how important the Tea Ceremony is in Japanese culture, the children insisted. It was probably the most inauthentic Japanese tea party every attempted, as we did not have traditional green tea (we just had our own camomile and other herbal teas), we didn't sit on the floor on tatami mats, and we didn't do any of the rituals or even have an actual ceremony. We did watch this video that explains the meaning of some of the parts of the Japanese Tea Ceremony, though. And we did drink out of bowls, which kind of resembled traditional Japanese tea bowls:
And we quite enjoyed ourselves, anyway!

Monday, June 1, 2015

Japanese treats

One of our neighbors served an LDS church mission in Tokyo, so we asked him to come over and tell us some of the things he knew about Japan. He was SO good with the children. He had them using chopsticks and learning to bow and say "konichiwa," and all kinds of fun things. We had a wonderful time. At the end of the night, he brought out some Japanese treats he'd gotten from the Asian Market. The children especially loved these little gelatin cups with the awesome name of "Portable Jelly":
The girls ate about half of this box all by themselves. Then they kept the little cups and played with them for several weeks.
I thought they tasted kind of funny, but not bad. They sure looked pretty!
Everyone's other favorite were these little Pocky Sticks (strawberry and chocolate flavors). Yum!
Related Posts Plugin for WordPress, Blogger...